HELP GUIDE
×
Menu
Quick Guides
Redemption schedule
 
Redemption schedule
1
Note features
1. Note features
Each note has a series of common features. Refer to Common Note Features for more information on each feature.
2
Class redemption schedule
2. Class redemption schedule
Use the yellow popup menu to select to show multiple class, single class or no class redemption schedule.
 
Multiple class redemption
 
 
Single class redemption schedule
 
3
Authorized shares
3. Authorized shares
Click on the checkbox icon to show or hide the authorized share section. Use the express menu to insert manual line, sort or delete lines.
4
Issued shares
4. Issued shares
Click on the checkbox icon to show or hide the issued section.
5
Default link
5. Default link
Select the default grouping you want to use for the note linkage. The note is defaulted to use the Map No link.
6
Link number
6. Link number
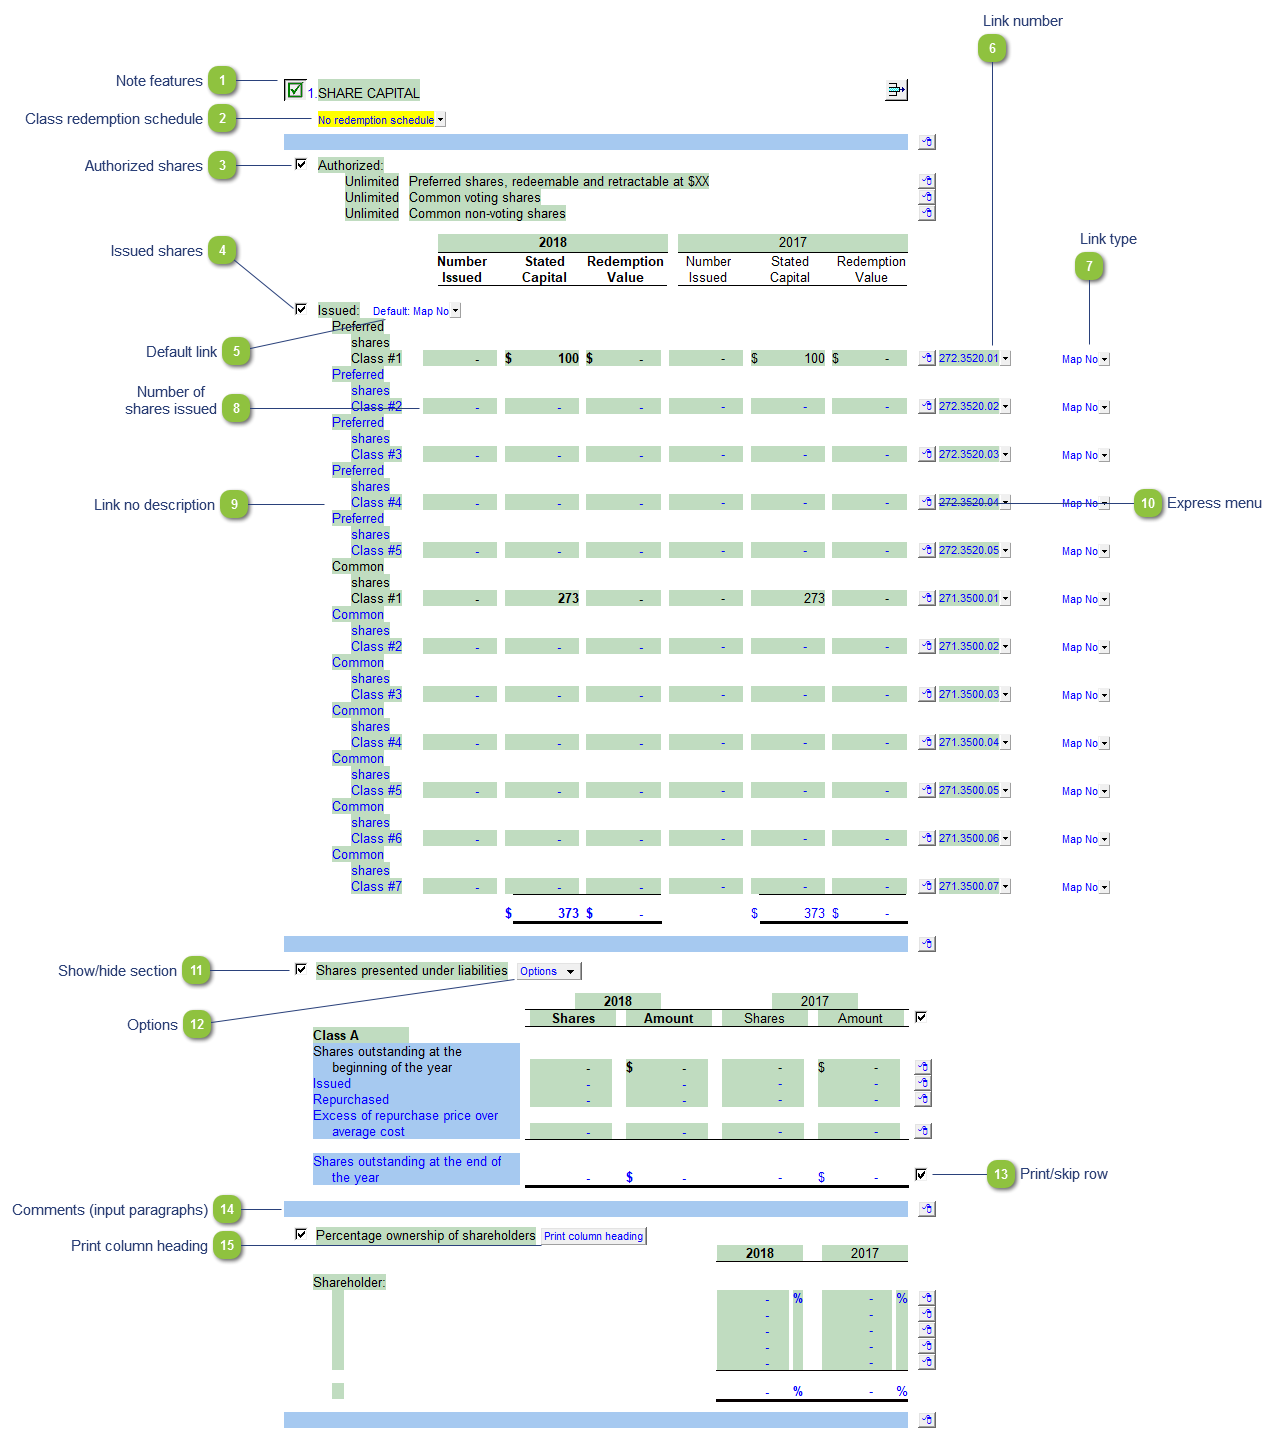
The link number indicates which linked number (i.e. map number) the row is linked to. Use the popup menu to select a link number. This can be a map, account or group number depending on the link type selected. Refer to Balance Origins for more information.
7
Link type
7. Link type
The link type is set from the default link type selected. You can change the link type for the individual row item if different from the default link type.
8
Number of shares issued
8. Number of shares issued
Enter the number of shares issued per share class.
9
Link no description
9. Link no description
The description of the linked number is also pulled into the Jazzit financial statements. Refer to Change a Line Description for information on changing a line description.
10
Express menu
10. Express menu
Right-click on the express menu to insert more linked or manual lines, insert subtotals, sort and delete current lines where the options are available.
11
Show/hide section
11. Show/hide section
Click on the checkbox icon to show or hide the section(s).
12
Options
12. Options
  • Sort share classes: Opens up the sorting window to sort the various share classes.
  • None and All: Enable or disable all share classes.
  • Individual share classes : Toggle individual share classes on/off.
 
13
Print/skip row
13. Print/skip row
Check off or uncheck the checkbox to skip or hide the total.
14
Comments (input paragraphs)
14. Comments (input paragraphs)
You can edit existing input paragraphs or insert more paragraphs using the express menu. Refer to Input Paragraphs for more information on inserting paragraphs.
15
Print column heading
15. Print column heading
Skip/print the column heading.