A 9-column generic note (KLIBKP9COL) can be inserted into the notes.
Only ONE note can be inserted. The note will be inserted at the end of the notes to the financial statements section and cannot be sorted with the rest of the notes.
The controls are similar to that of the Generic 9-column schedule.
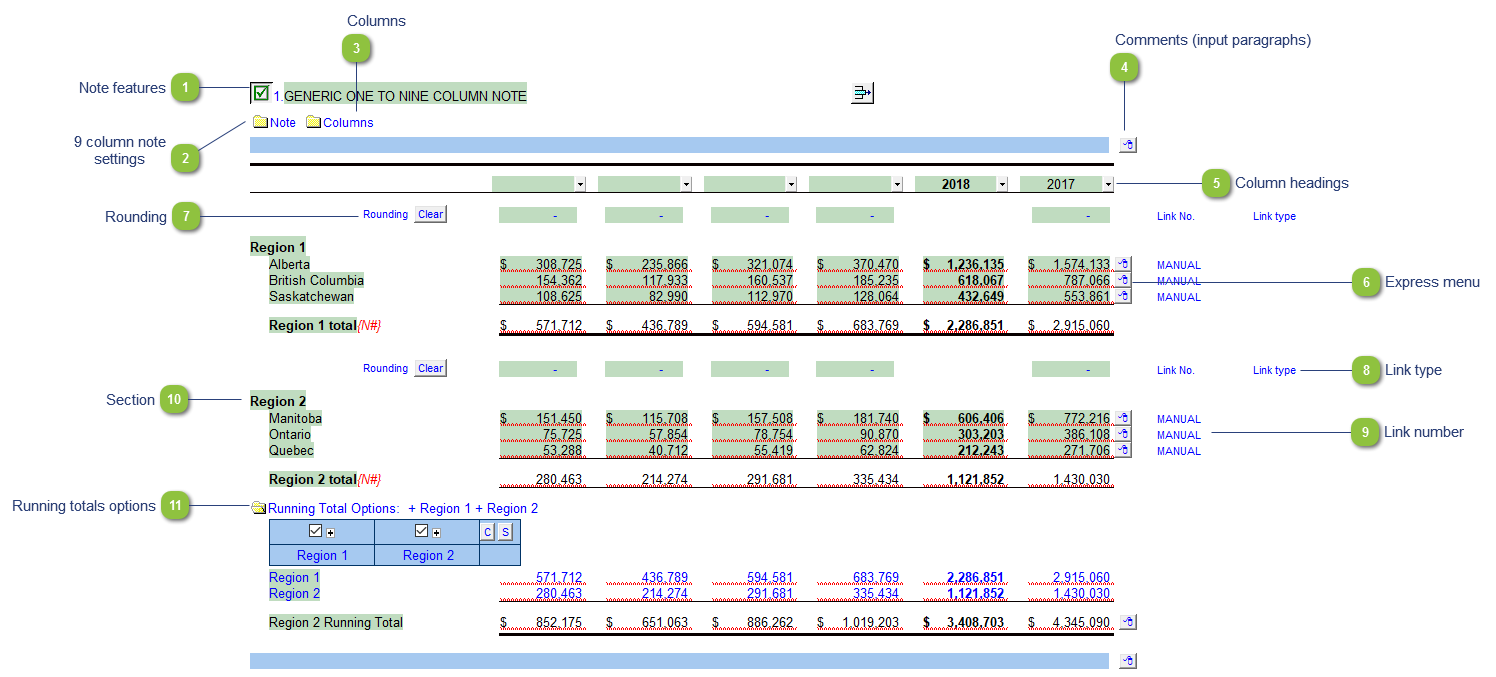
* the above screenshot was taken with the display option set to show Printing lines for illustration purposes. We recommend the default display option is set to Show all lines when drafting the financial statements.
Note features
Each note has a series of common features. Refer to Common Note Features for more information on each feature.
The note settings provide additional options for the 9 column note.
Sections visible: Choose to show up to 6 sections in the note.
Grand total: Use the drop-down menu to show the grand total at the end of the sections.
Running totals: Use the drop-down menu to show the running total after each section.
Default link type: Select the default grouping you want to use for the note linkage. The note is defaulted to use the Map No link.
Comparative row: Use the drop-down menu to show the comparative row at the bottom of the note.
Foreign Exchange: Use the drop-down menu to apply foreign exchange values globally if entered in Caseware.
Is this the only note?: Set this to 'Yes' when the 9 column note is the only note present in the Jazzit Financial Statements. Otherwise a blank page will print as part of the note section.
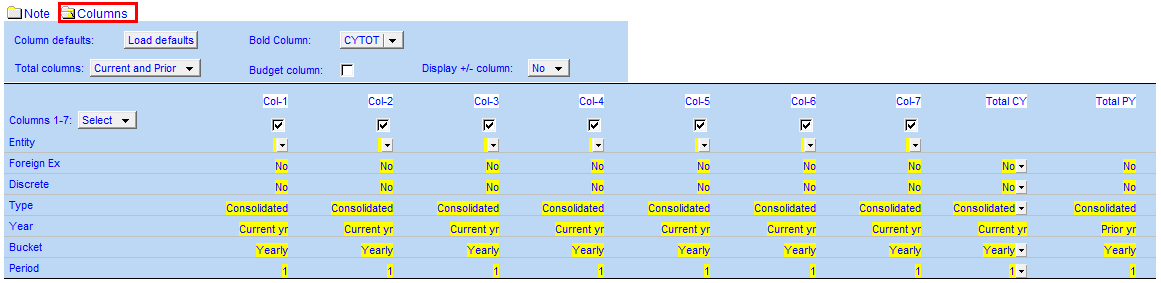
Click on the folder icon to show the column settings.
Column selector: Use the Select dropdown to enable or disable additional columns. The checkbox can be used to disable activated columns.
Use the controls to setup the required number of columns and its required settings. Refer to 9 Column Statements with Budget Column for more detailed information on the column settings.
Entity: Assign the entities to the relevant columns. Entities should be added using the consolidations dialog in Caseware.
Foreign Ex: The foreign exchange can also be applied to each individual column(s).
Discrete: Select the discrete period (Yes = Period movements, No = cumulative balances up to period selected (year-to-date)).
Balance type: Select the balance type (budget, consolidated, report, adjusted, unadjusted, forecast) that you want to use. This can be used when setting up Group/Company statements.
Year: Select the financial year (current, prior 1 through 4) for each column.
Bucket: Select the bucket (active, random, yearly, semi-annually, quarterly, monthly, etc.) for each column.
Period: Select the relevant period within the year selected that you want to view. This is dependent on the Bucket selected.
You can edit existing input paragraphs or insert more paragraphs using the express menu (). Refer to Input Paragraphs for more information on inserting paragraphs.
Use the checkboxes to the left of each heading line to skip or print the headings. Select the heading option you'd like to print using the popup menus. The following headings are available:
Row 1: Entity name - This is populated from the Engagement > Consolidate dialog in Caseware. You can also manually enter your own column heading description is you are not using entities for the note.
Row 2: Balance type - Consolidated, Report, Unadjusted, Adjusted, Budget and Forecast. This can be used in conjunction with the balance type setting selected in the column settings.
Row 3: Selected period - Year-to-date, Months, Quarters, Periods, etc.
Row 4: Choose show to unaudited or restated in the headings.
Row 5: Description changes based on bucket selection in the column settings.
Row 6: Shows the year-end. You can also choose to show the balance type here.
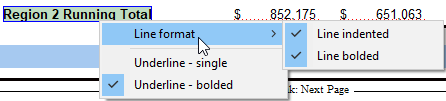
Right-click to access the express menu to insert more linked or manual lines, insert subtotals, sort and delete current lines where the options are available.
Type rounding amount to round the note if necessary. The amount is rounded to the designated rounding line as indicated by the .
To apply the rounding difference to a row, right-click on the express menu () and select Adjust this row for rounding. The indicates the designated rounding line. Rounding cannot be applied to manual rows.
The link type is set from the default link type selected. You can change the link type for the individual row item if different from the default link type.
Use the popup menu to select a link number. This can be a map, account or group number depending on the link type selected. Manual rows will not have a link number.