JZ009 How should I set up my Caseware and Windows settings for use with Jazzit?
The following are the recommended settings for CaseWare when using Jazzit.
CaseWare settings
Options in CaseWare
-
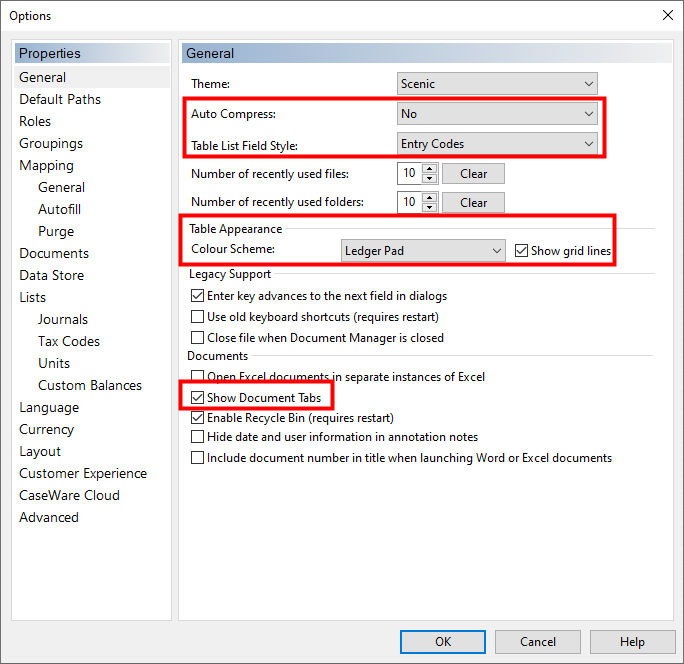
Open CaseWare and click Tools > Options to access the Options dialog. You will see a list of Properties that need to be set.
Properties to be set in the options window
-
General:
-
Auto Compress: Set to either ‘No’ or ‘Prompt’. The Jazzit template files (KLIB, GENMST, etc) should be left uncompressed.
-
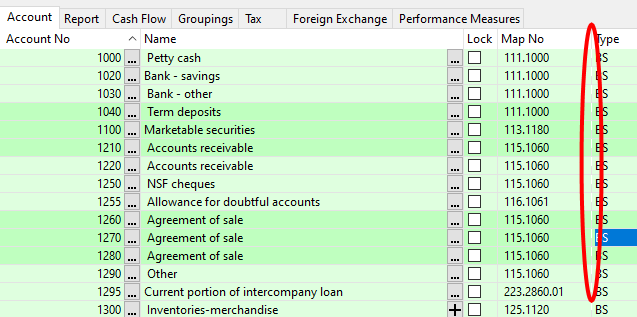
Table List Field Style: To maximize the number of columns displayed on the working trial balance at one time, we recommend setting this to ‘Entry codes’. This reduces the amount of space required by a column by abbreviating its data. For example, ‘Balance Sheet’ in the Type column becomes ‘B’ when set to ‘Entry codes’
-
Table Appearance: Colour Scheme is mainly personal preference. However we suggest using a scheme that alternates row shadings such as ‘Ledger Pad’ or ‘Rainbow’. This makes it easier to discern between the rows. Consider checking off “Show grid lines” to increase readability.
-
Default PathsSet the default Client File Path to the folder where your client CaseWare files are located. Set template path to drive and location where the Jazzit templates are located. It’s a good idea to set a different path for the templates. For example:
-
Client File Path: G:\Client Data\
-
Template Path: G:\Client Data\Templates
-
-
Mapping (general)a) Mapping Mask: Ensure that the field is filled with ‘xxx.xxxx.xx’b) ‘Show account balances in the Assign Mapping Numbers dialog’ is checked off.

-
Documents
Uncheck all checkboxes in the ‘Display and print zero balances on’ section. This will reduce the size of CaseWare automatic documents by hiding all lines with nil balances.

CaseWare working trial balance settings
Setting the Fold Line
Right-click any dividing line between columns to set the Fold Line. The Fold line will be indicated by a vertical dotted line. Columns to the left of the Fold line will continue to display on the screen as you scroll through the columns to the right of the Fold line (similar to freeze panes in Excel). We recommend putting the Fold line in front of the: Account #, Account name and Map No columns. Press F11 to fold and unfold your document quickly.
View / Reorder columns
Right-click on the columns heading for the “Reorder Columns...” option. Using this will allow you reposition the most frequently used columns together.

CaseView settings
Display preferences
-
In CaseView click View > Preferences to access the Display Preferences.
-
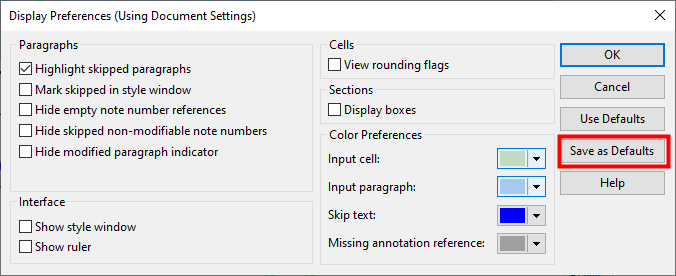
In the Color Preferences we recommend the following colors as outlined below.
-
Input cell - light green (Hue: 80, Sat: 69, Lum: 194, R:192 G: 220 B: 192)
-
Input paragraph - light blue (Hue: 141, Sat: 171, Lum: 191, R:166 G: 201 B: 240)
-
Skip text - default color (Hue: 160, Sat: 240, Lum: 120 R:0 G:0 B:255)
-
Missing annotation – default color (Hue: 160 Sat: 0 Lum: 151, R: 160, G: 160, B:160)
-
The default color settings (dark gray) can make it difficult to see your cursor position within input paragraphs.
-
Click on ‘Save as Defaults’. This will apply these colour settings to any CaseView documents opened on this workstation.
-
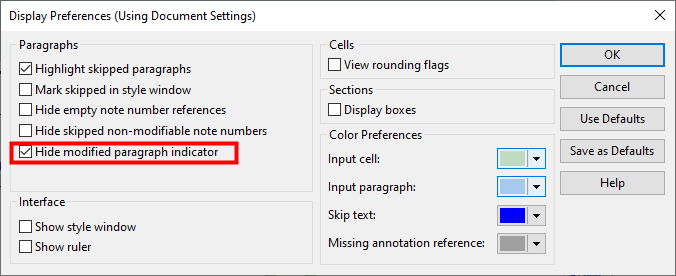
We recommend checking of ‘Hide modified paragraph indicator’. This will remove the vertical red lines that appear on the left side of text fields.
CaseView Application options
Units of measurement (Inches)
The Jazzit templates are intended to be used with CaseView set to Inches rather than centimetres. Ensure your firm workstations are set to Inches.
-
Open CaseView and go into design mode (View > Design Mode). Please note, design mode in certain Jazzit templates are locked out. Try opening a different CaseView document or create a new CaseView document when you run into this.
-
Open Application Options (Tools > Options). Click on the measurements tab.
-
Set your Measurement Units to Inches.
 Enable Multiple Document WindowsWe disabling the option Enable Multiple Document Windows in CaseView > Tools > Options > Interface. This allows Step 5 in the updating process to work correctly.
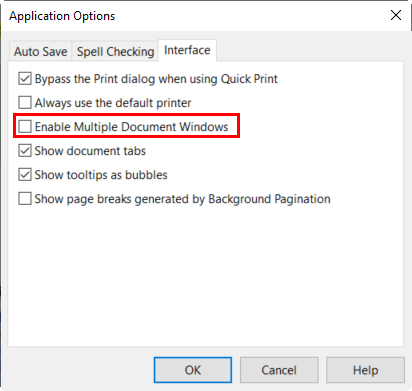
Windows regional settings
Correct Windows regional settings ensures that the Jazzit templates appear and function correctly. Incorrect regional settings may cause issues with:
-
Rounding - If the regional settings are not set correctly, it may cause the rounding to continually be in a recalculate position.
-
Date presentation - The date in Jazzit letters will looks different than what is expected. Typically, the date is presented as month, day, and year (ex: September 30, 2017), however the date may appear differently (ex: September-30-17)
-
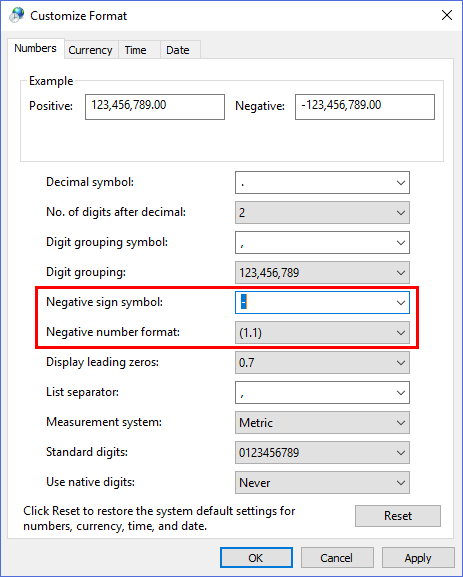
Negative values - Negative numbers can be displayed in brackets or using a dash symbol. For example “$(50.00)” or “$-50.00”. The default presentation for Jazzit templates is with brackets “$(50.00)”.
Changing Long Date format
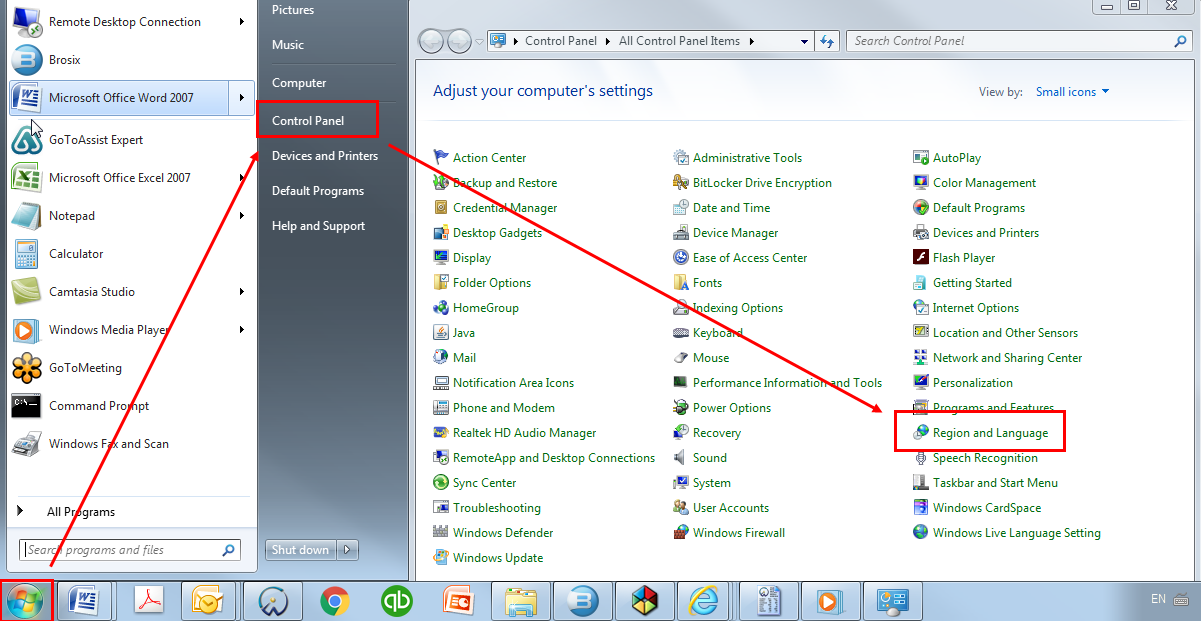
In Windows 7 click Start button > Control Panel > Region and Language
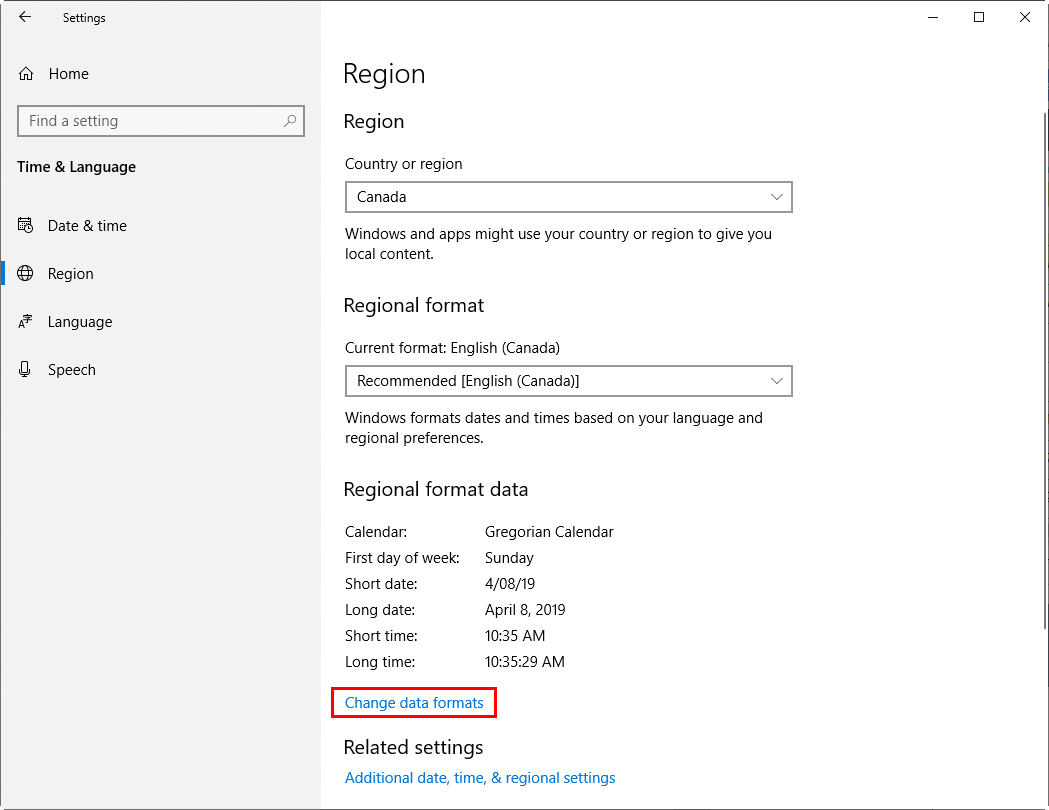
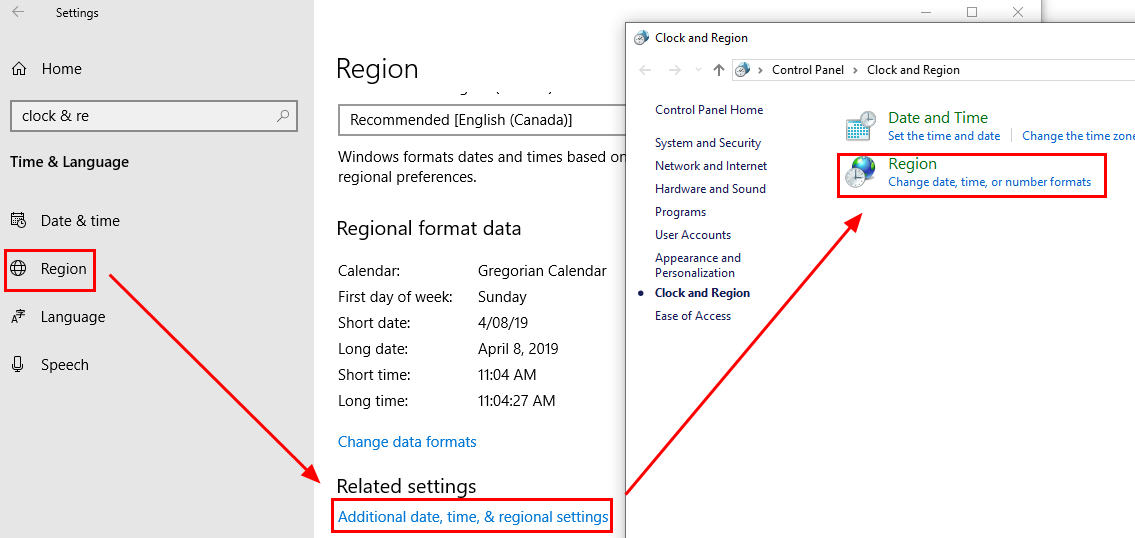
In Windows 10 click Start button > Settings  > Time & Language > Region > Change data formats
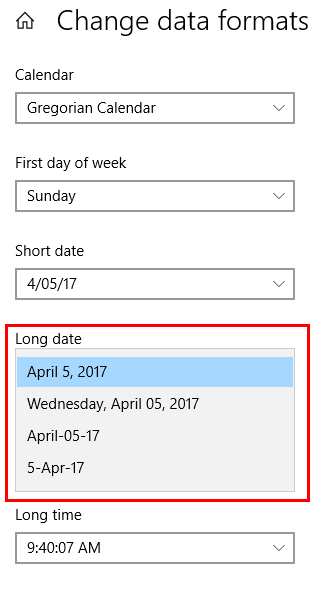
Set the Long date format to MMMM d, yyyy in Windows 7 or April 5, 2017 in Windows 10
|
Date format in Windows 7
|
Date format in Windows 10
|
 |
 |
Changing Number and Currency format
In Windows 7 click Start button > Control Panel > Region and Language > Additional settings…
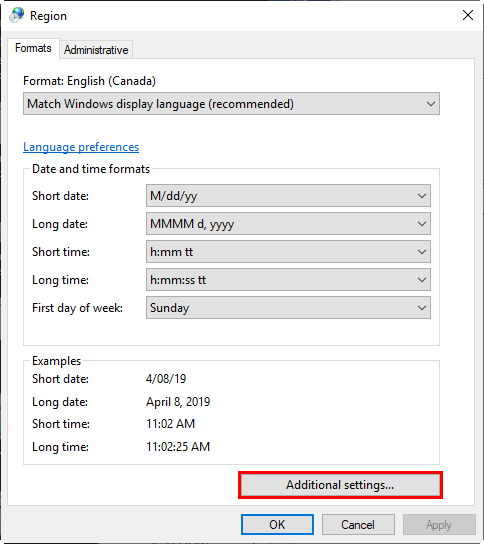
In Windows 10 click Start button > Settings > Time & Language > Region > Additional date, time, & regional settings > Region > Additional settings
Ensure the Numbers tab and Currency tab are using the settings below.
|
Numbers Tab
|
Currency Tab
|
 |
 |