1-9 Income Statement with Budget Schedule
 
1-9 Income Statement with Budget Schedule
1
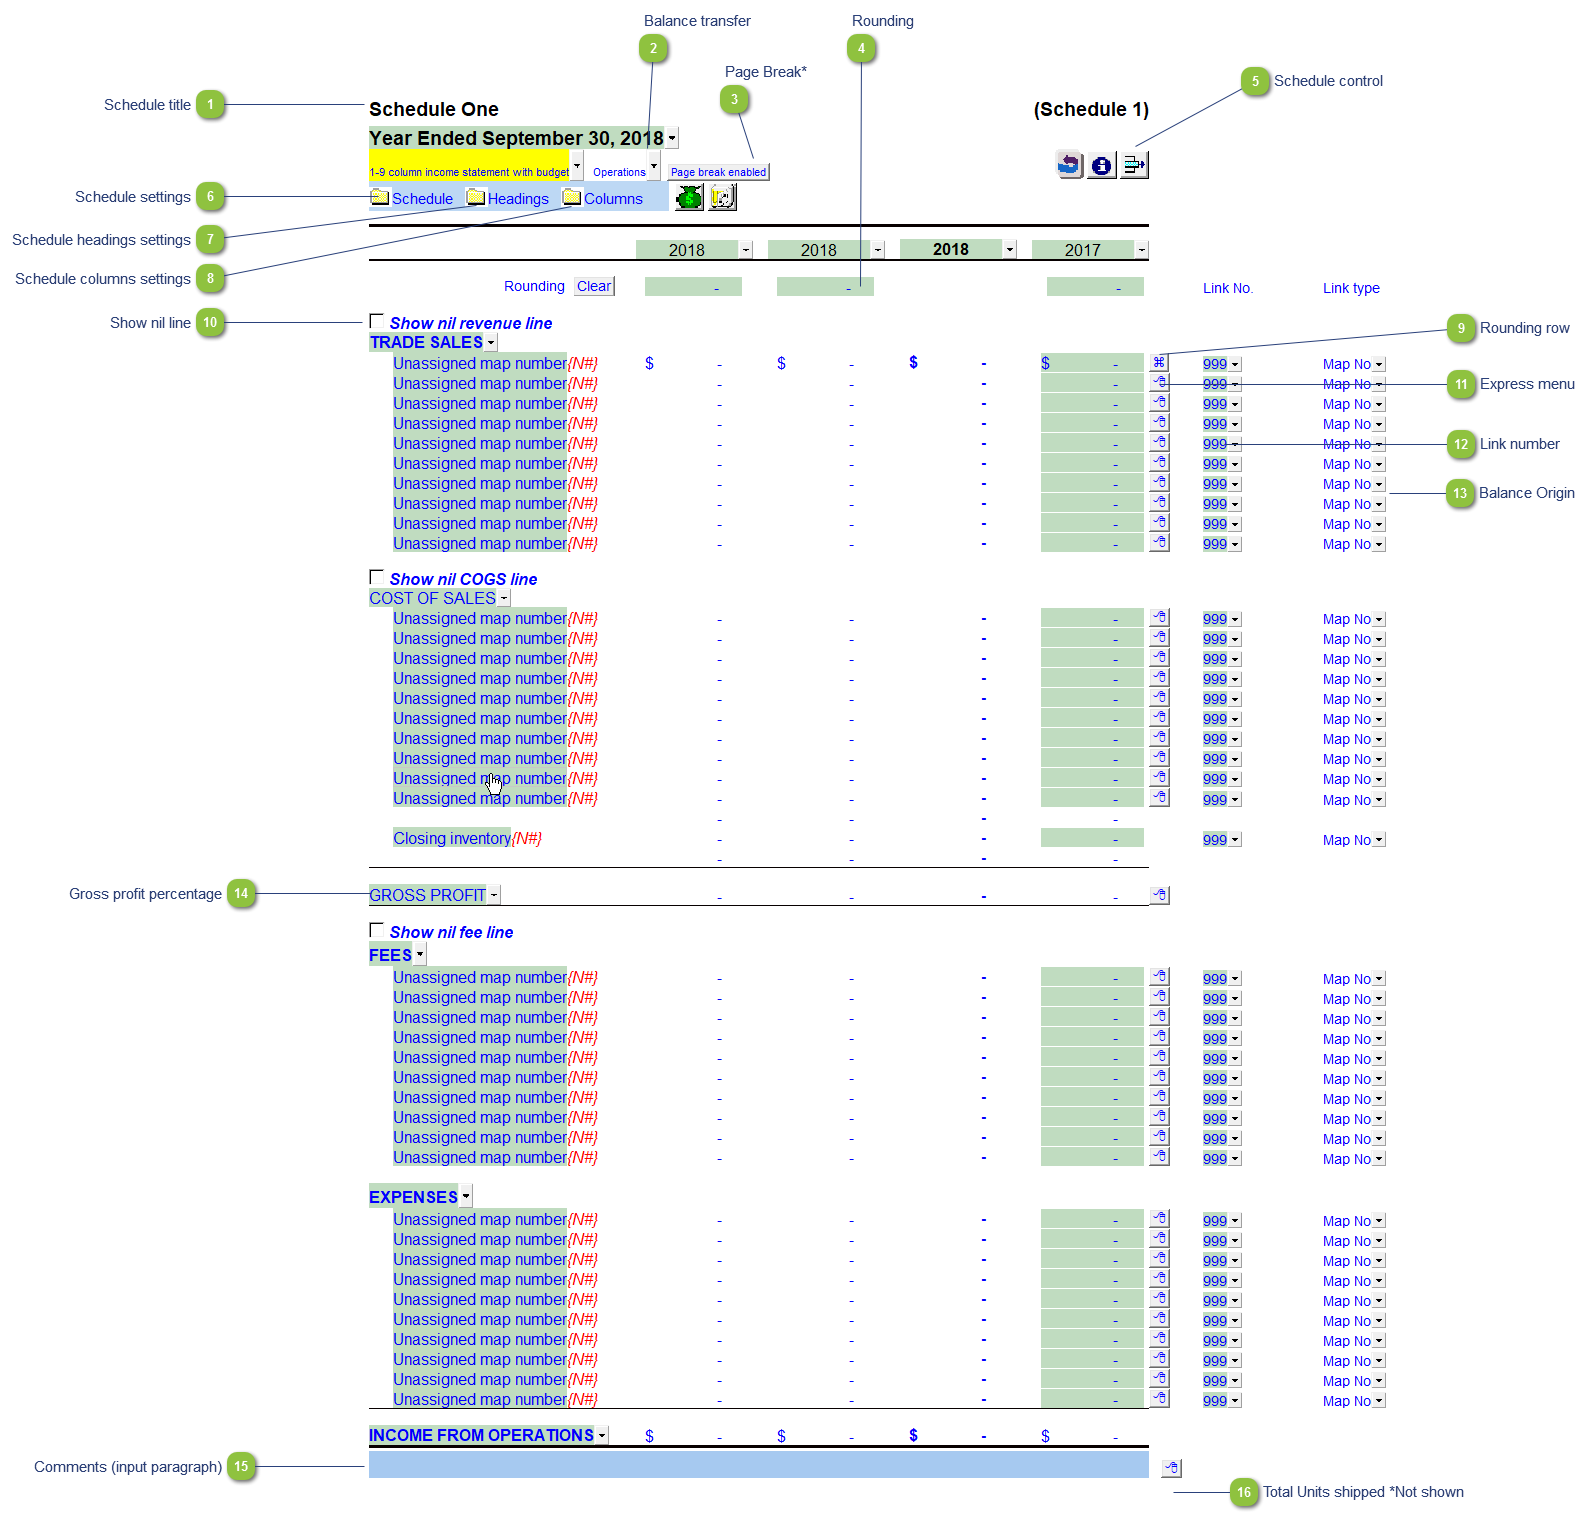
Schedule title
1. Schedule title
Customizable schedule title which appears at the top of the schedule and on the Index Page
2
Balance transfer
2. Balance transfer
Select from the dropdown if the schedule total should be included in the following Income Statement areas:
 
Operations - Transfer schedule total to the related areas of the income statement i.e. Trade sales to Trade Sales, Cost of Sales to Cost of Sales, etc.
Net in other income - Transfer schedule total to other income in the Income Statement.
Net in trade sales - Transfer schedule total to trade sales in the Income Statement.
Net in fee income - Transfer schedule total to fee income in the Income Statement.
Exclude from income statement  - No balances transfer to the Income Statement.
3
Page Break*
3. Page Break*
Select if the page break should be enabled at the top of the schedule. *Note: this option is available only when the schedule is set to 4 columns or less. The button shown in the 9 column screenshot above is for illustrative purposes only.
4
Rounding
4. Rounding
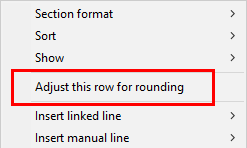
Enter amounts for rounding of the schedule if needed.  The rounding amounts will be plugged into the designated rounding line which is indicated by . Right-click on a line for the option to designate the row for rounding.
 
5
Schedule control
5. Schedule control
Left-click the button to delete the schedule.  Right-click the button to reload the schedule from the Resource Centre.
6
Schedule settings
6. Schedule settings
Open the SCHEDULE folder to find the following schedule settings:
 
 
Default link type - Select the default grouping you want to use for the schedule linkage. The schedule is defaulted to use the Map No link.
Comparative row - Select if you would like to print a manual comparative prior year row after the total at the bottom of the schedule.
Foreign exchange - Select to apply foreign exchange to the schedule.
Gross profit % - Toggle gross profit % on/off. Note: This option is only available when only the CY and PY columns are enabled.
Percentages - Set the number of decimal points to be displayed in the schedule.
7
Schedule headings settings
7. Schedule headings settings
Open the Headings folder to find the following schedule headings settings. Settings will now retain on update. See Statement Section Headings Formatting for more information.
 
 
Bold - Set the desired heading to bold.
Uppercase - Set the desired heading to uppercase.
Singular - Set the desired heading to singular.
Heading - Select the desired heading title or enter a custom description (entering a custom description will cause the uppercase and singular option to no longer function on that specific line).
Reload firm formatting - Click on Reload firm formatting to set the heading formatting to match as set in the Resource Centre module.
8
Schedule columns settings
8. Schedule columns settings
Open the COLUMNS folder to find the following schedule headings settings:
 
 
Column defaults -  Set the column defaults from the Resource Centre (current year and prior year totals are default).
Bold Column - Select which column is to be bolded.
Total columns - Select if you would like both total columns to appear, only the current or prior year total column, or no total columns.
Budget column - Set the budget column on or off.
Display +/- column - Set to display the signage column to the right of each line.
Column Selector - Choose which column will be used in the schedule.
Entity - Assign the entities to the relevant columns. Entities should be added using the consolidations dialog in Caseware.
Foreign Ex - The foreign exchange can also be applied to each individual column(s).
Discrete - Select the discrete period (Yes = Period movements, No = cumulative balances up to period selected (year-to-date)).
Type - Select the balance type (budget, consolidated, report, adjusted, unadjusted, forecast) that you want to use. This can be used when setting up Group/Company statements.
Year - Select the financial year (current, prior 1 through 4) for each column.
Bucket - Select the bucket (active, random, yearly, semi-annually, quarterly, monthly, etc.) for each column.
Period - Select the relevant period within the year selected that you want to view. This is dependent on the Bucket selected.
 
For more information on the above settings, refer to the column settings page in the Help File
9
Rounding row
9. Rounding row
To apply the rounding difference to a row, right-click on the express menu and select Adjust this row for rounding. The indicates the designated rounding line.
 
10
Show nil line
10. Show nil line
 
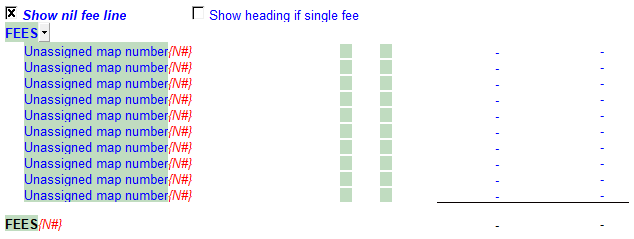
Select the tickbox if you would like a section without balances to print a total nil balance line.
 
 
Once selected, you can choose to rather display the section heading with a single nil line instead
 
11
Express menu
11. Express menu
Right-click on the express menu to insert more linked or manual lines, insert subtotals, sort and delete current lines where the options are available.
12
Link number
12. Link number
The link number indicates which linked number (i.e. map number) the row is linked to. Use the popup menu to select a link number. This can be a map, account or group number depending on the link type selected. Refer to Balance Origins for more information.
13
Balance Origin
13. Balance Origin
The link type is set from the default link type selected. You can change the link type for the individual row item if different from the default link type. You can also double-click on the balance origin for lines to link to a generic note.
14
Gross profit percentage
14. Gross profit percentage
Right-click on the Gross Profit cell to either show or hide the percentages and decimal places.
 
15
Comments (input paragraph)
15. Comments (input paragraph)
You can edit existing input paragraphs or insert more paragraphs using the express menu. Refer to Input Paragraphs for more information on inserting paragraphs.
16
Total Units shipped *Not shown
16. Total Units shipped *Not shown
Decimal points can also be modified here.
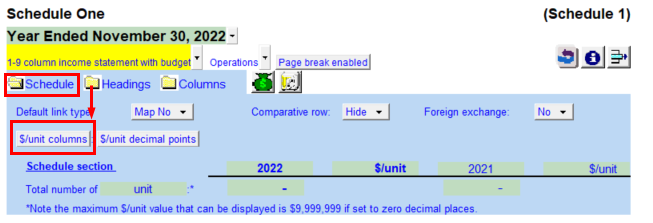
In the schedule you need to enable $/unit columns to have this line show. To do this go to Columns and set % or $/unit to Yes.
Then go to Schedule options and enable $/unit columns.