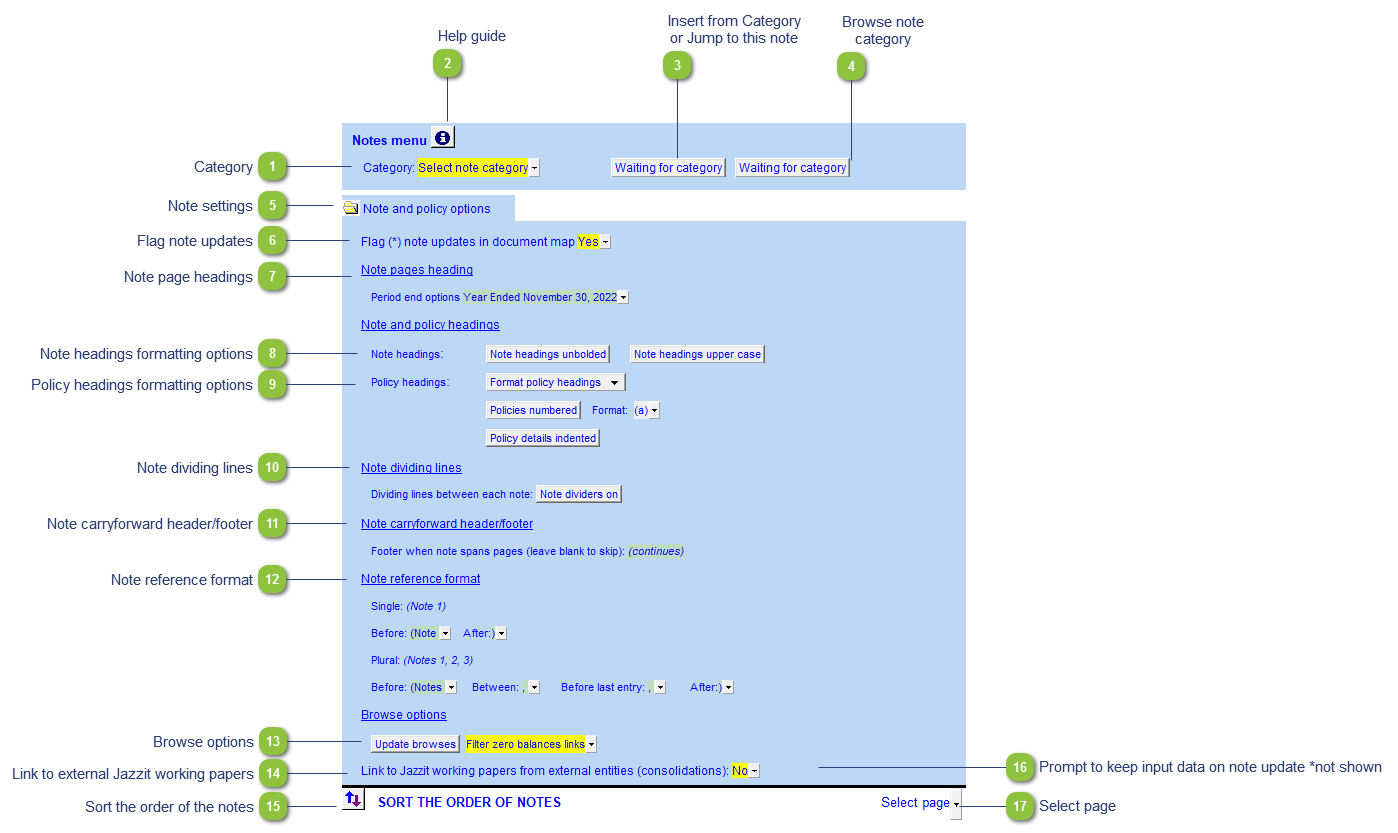
The NL- Notes menu control panel is located at the top of the Notes to the financial statements section. It is used to add new notes from the Resource Centre and to set up additional setting for the notes. These settings can be set as default in the Resource Centre module (NL - Notes menu) by the Jazzit Administrator. For a complete list of all note categories available, refer to Notes Summary and Behaviors.
Category
Select the category you want to insert the note from. Each category will give you additional formats you can choose from. Use theBrowse category alternatives button located to the right of the Notes menu to see the various note category formats.
After selecting a Category you will either see an Insert from this category or a Jump to this note button.
Certain categories only allow you to insert one note format at a time. The Jump to this note button indicates that a note from the selected category has already been copied into the statements. Refer to Behavior of Notes Summary. Click on the button to navigate to the note.
If you require a different format of the existing note, delete the note and insert the correct format from the note category.
Use this option to browse the various note formats available in this category. A separate CaseView document (the Resource Centre module) will open. The note module is locked to prevent editing by non-Jazzit Administrators. You will, however, be able to edit the note once you have copied it into your statement.
The module allows you to view the following information:
Instructions regarding this note module
The various note formats. Make a note of the specific format option you'd like to insert
Revision dates of the note within the Resource Centre
When you're ready to insert a note, close the Resource Centre module and click on the Insert from this category button. Refer to Inserting a note for further information.
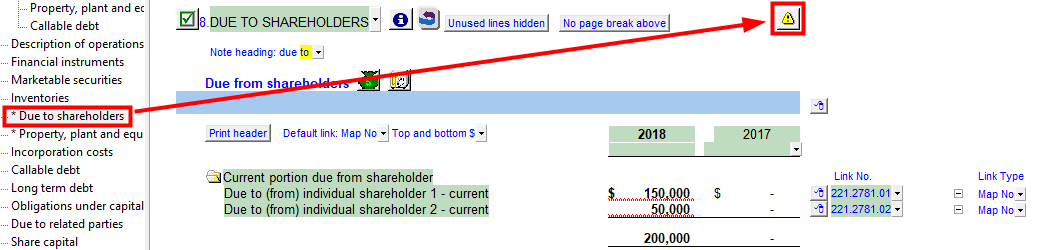
Notes requiring updates will be flagged with an asterix (*) in the document map. When used in combination with the “Notes and policies” notification under Home menu / Admin this can help you quickly pinpoint specific updates. Use the popup menu to select whether you want to see these flags or not.
Presentation of period end in the page headings for notes. Use the popup menu to select an alternate format or type in your own wording into the input cell.
Replacing or removing the wording in the input cell allows you to either modify or remove the wording '(continues)' which appears at the bottom right of statement pages which span multiple pages
Use the Update browses button to update the browses from the Resource Centre, this is the popup you see when double-clicking on an amount or a line item description. Also choose if you want to see accounts with zero balances in the browse or only accounts with balances. This option is very helpful when adding lines to a blank master financial statement template. Click on Update browses to fix issues with the Balance Origins feature.
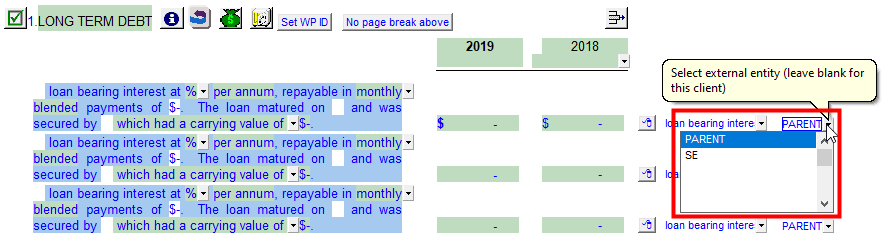
The debt notes, PPE and marketable securities notes can link to Jazzit working papers that exist in other Caseware files. This is useful when using the consolidation feature in Caseware. You can link up to a maximum of 20 external entities.
The relevant notes will have an additional Entity column. Use the popup menu to select the entity you want to link into the note. Insert more lines into the note to add more rows. Refer to Behavior of Notes Summary to see which notes have the functionality.
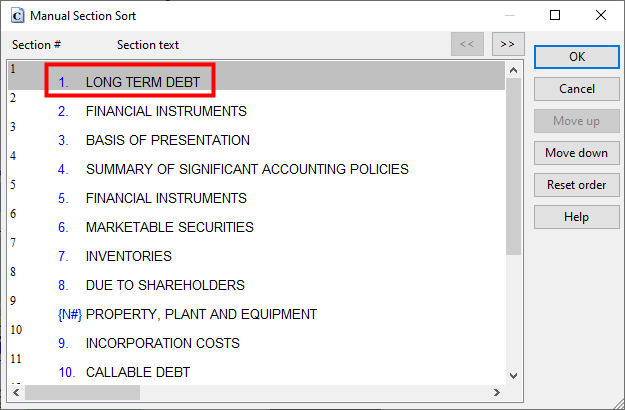
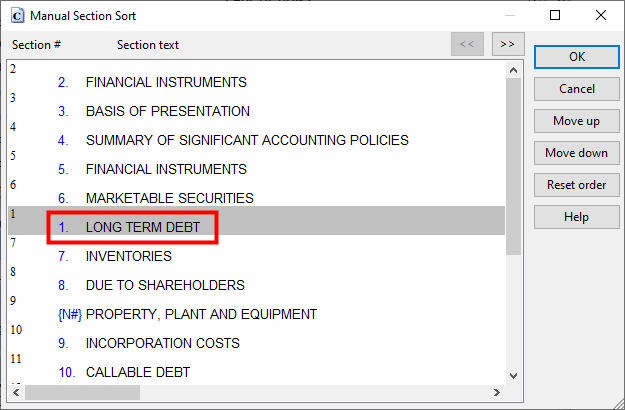
Click on the sort button to move a note to the desired position. Use the Move up or Move down buttons to move the note heading. The note numbers and note references will automatically be updated.
Prompt to keep input data on note update *not shown
When updating a note, the input cell data is kept by default. If you want a prompt to keep input cell data enable this option. Note: This option is hidden, you need to be in Edit Mode (View > Enable Editing) to see this option.