Making changes to your headers and footers
The headers and footers are split between the HF and the HG modules. The HF module control the headers and footers for the Engagement Report and the financial statements while the HG module control the headers and footers for the letters.
-
Open either the HF or HG modules depending on where you want to adjust.
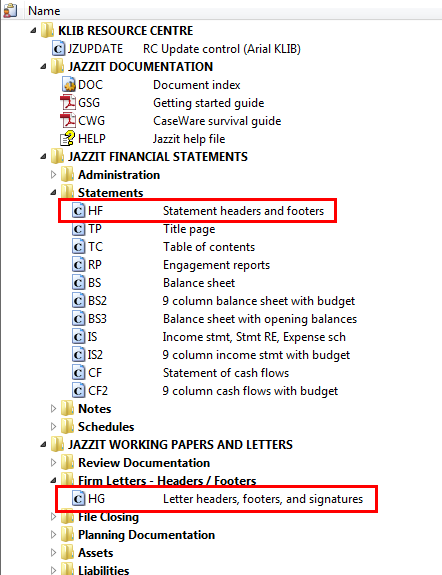
-
You have various default spacing options that can be set for the headers and footers.

-
Go into Design Mode (View > Design Mode) and enter the administrative password.
-
Look for the header or footer you want to change.
-
To insert text, tables or pictures in the header, right-click on the << Remove the skip always to insert letterhead here >> line and select Paragraph. Change the Skip > Print option from Always to Print and click on OK.
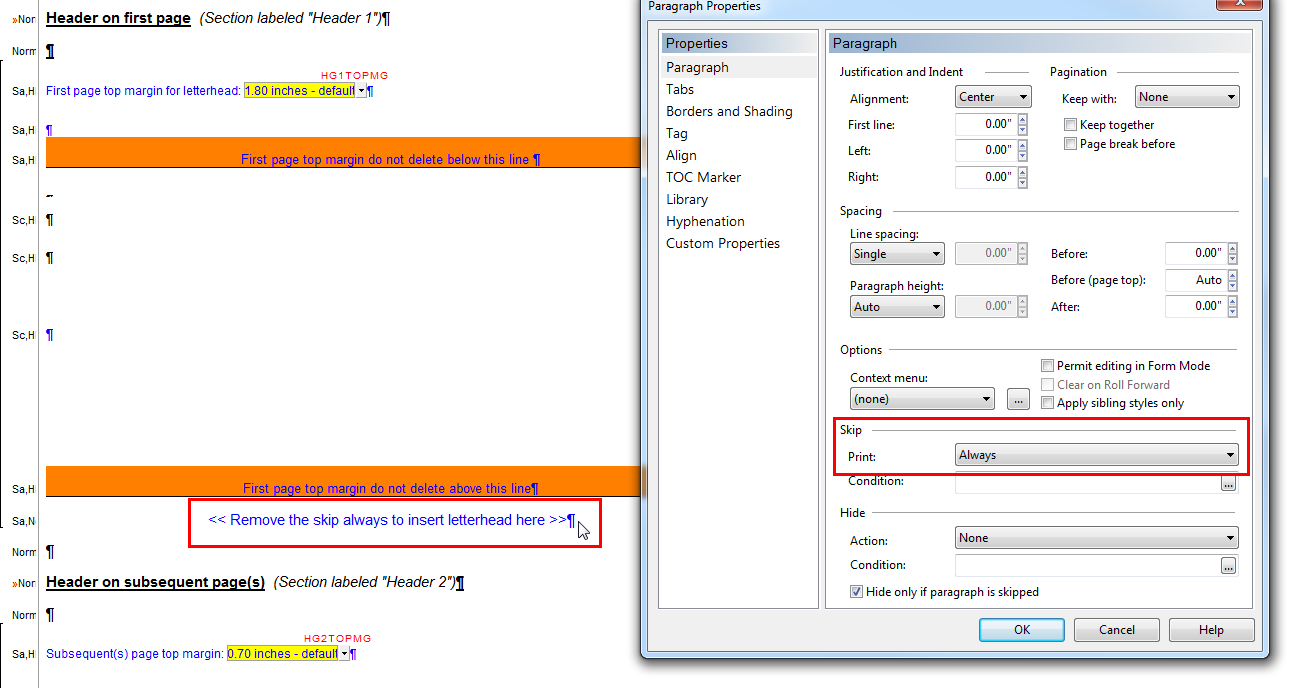
-
The line will now be set to print. Carefully delete the << Remove the skip always to insert letterhead here >> text so all you see is the black paragraph marker. Be careful not to delete the paragraph.
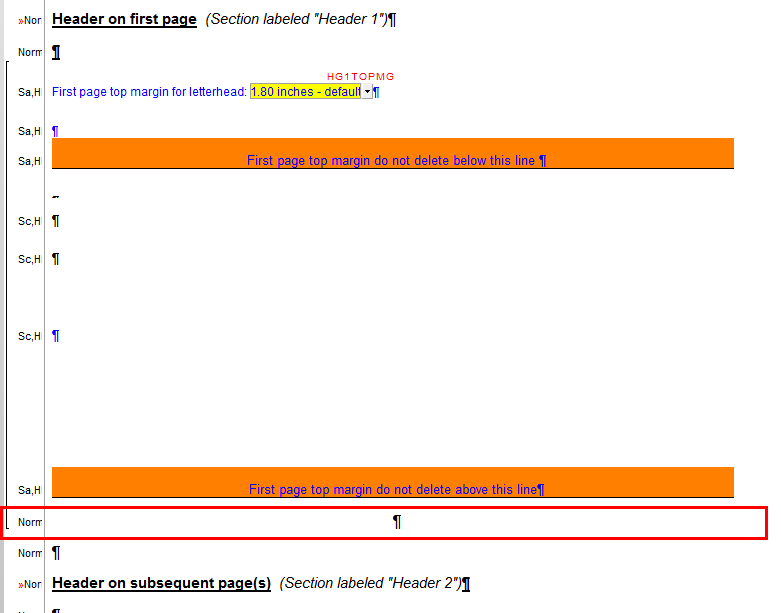
-
You can insert logos using the Insert > Picture function. Go To Insert > Picture.
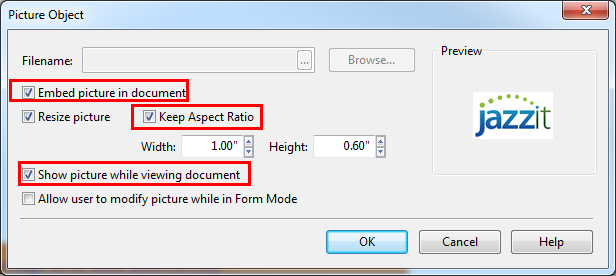
-
Search for the file using the browse button.
-
Make sure the Embed picture in document and Show picture while… is checked.
-
You can also adjust the height and width of the picture. Make sure that you select Keep aspect ratio. Click OK.
-
Preview the document.
-
Changes can be made by double clicking on the object and this window will open again.
-
Exit Design Mode and Save and close the HG or HF module.
-
Open up your master or client file to update the headers and footers.
For the HF module changes:
-
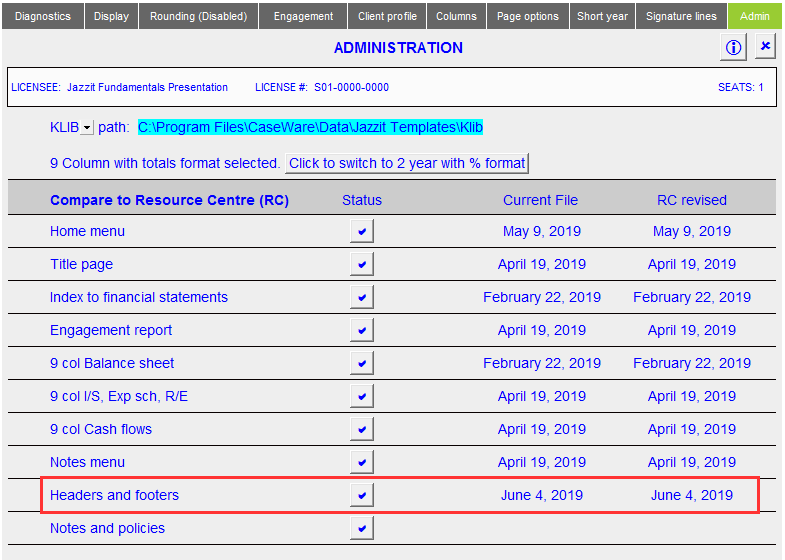
Open up the Jazzit financial statements and click on Admin and select Reload from resource Centre.
For the HG module changes:
-
Open up each letter.
-
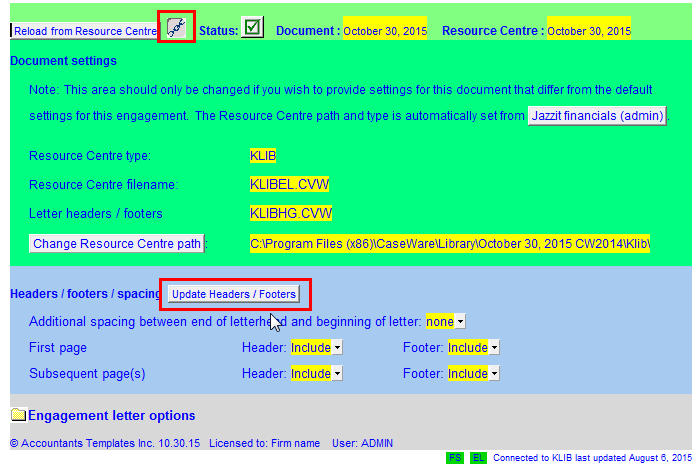
Click on the document settings (
 ) icon and select the Update Headers/Footers.
Please refer to the CaseView help (F1) for assistance in inserting tables and texts.