HELP GUIDE
×
Menu
Quick Guides
Linked to JI WP
 
The linked to JI WP option allows you to link balances from the working papers. The balances in the note will transfer to the line item on the Balance Sheet. For this note to work, you will need to have the working papers in your client file.
 
The following information flows from the working paper to the note:
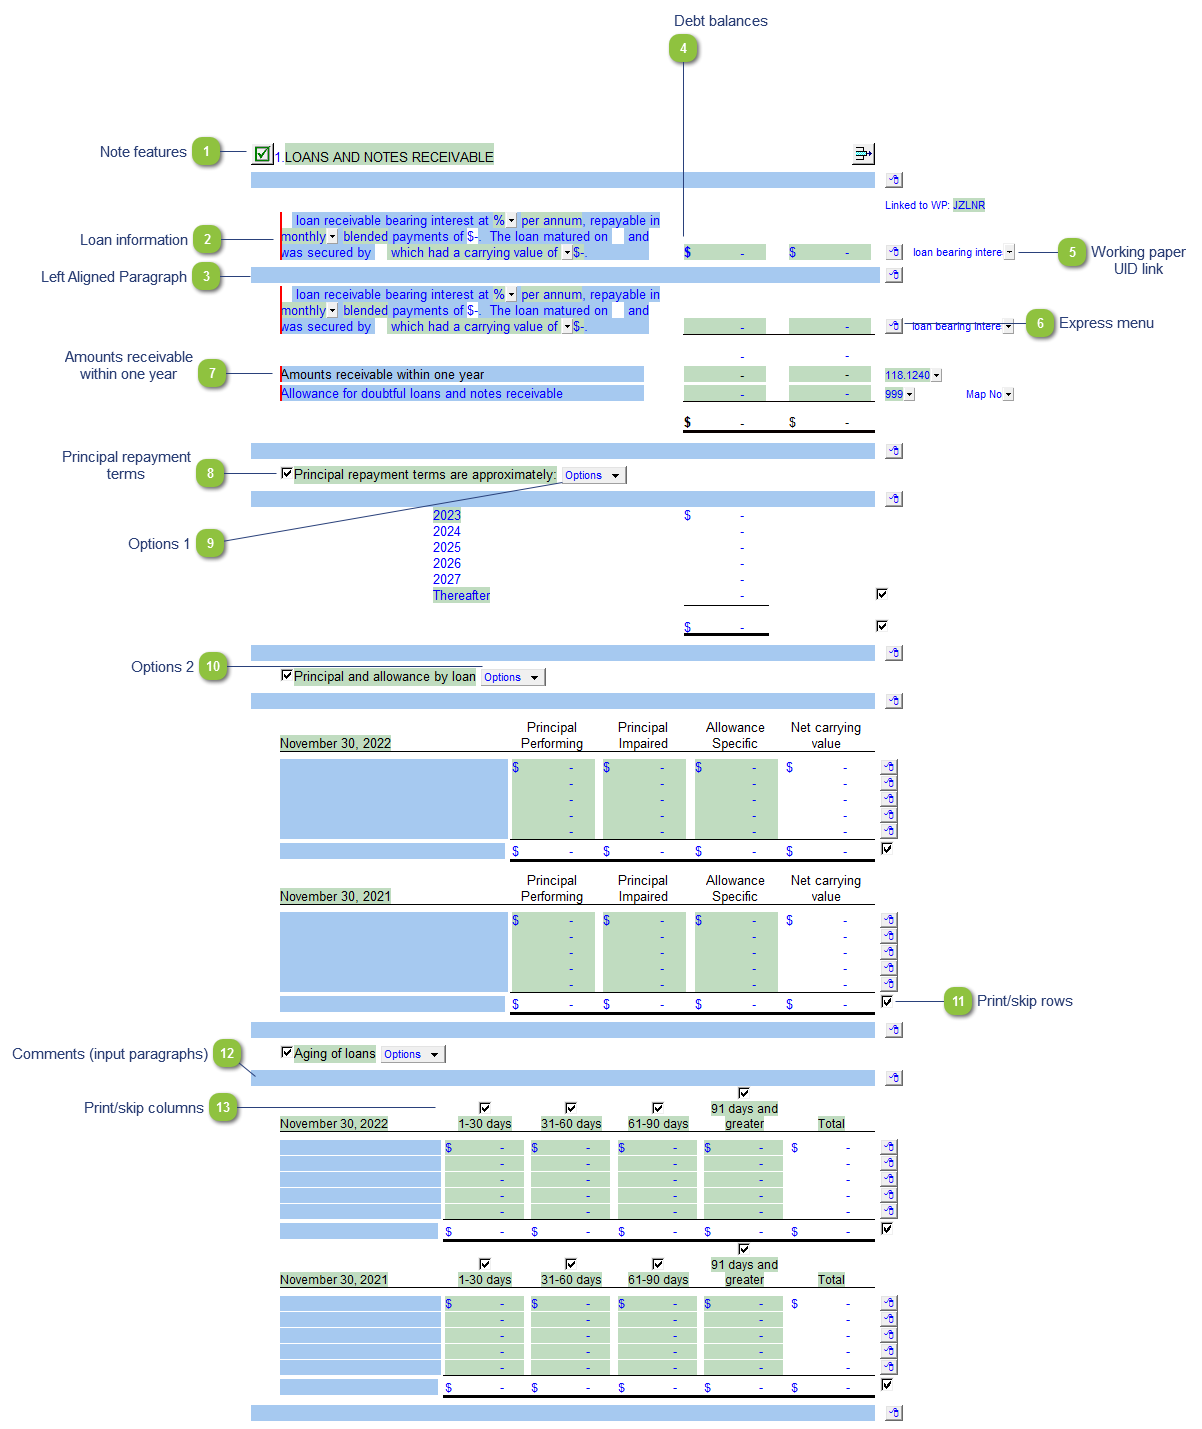
 
 
Linked to JI WP


1
Note features
1. Note features
Each note has a series of common features. Refer to Common Note Features for more information on each feature.
2
Loan information
2. Loan information
The loan details are transferred from the working paper to the note. Hover over each cell to see the tool tip information. Double-click on selected cells to jump to the working paper to make changes if required.
3
Left Aligned Paragraph
3. Left Aligned Paragraph
The ability to insert a left aligned paragraph exists in the express menu.
4
Debt balances
4. Debt balances
The balances are transferred from the working paper. Double-click on any of the balances to jump to the working paper.
5
Working paper UID link
5. Working paper UID link
A UID number is assigned to each row in the working papers. Select the UID number that you want to link to from the popup menu.
6
Express menu
6. Express menu
Use the express menu to insert more linked and manual lines, insert subtotals, sort and delete current lines where the options are available.
7
Amounts receivable within one year
7. Amounts receivable within one year
The amount due within one year is linked to the table through the map number. All the amounts are transferred from the working paper with the exception of the current portion. We cannot pull this number from the working paper as only the current year's amount is on that working paper (i.e. last year's current portion does not appear). While the current year's amount could move to the prior year in a roll forward, this does not help in the first year. This amount will be included in the balance transferred to the Balance Sheet.
8
Principal repayment terms
8. Principal repayment terms
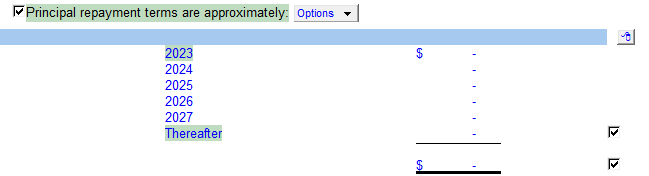
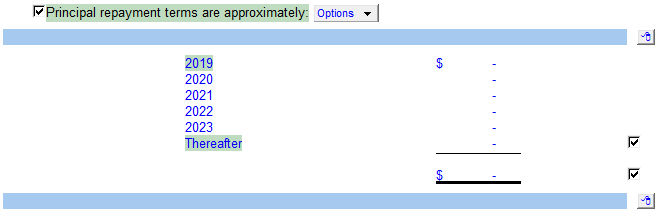
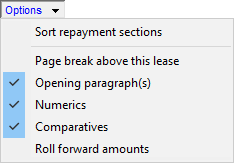
Click on the checkbox icon to show or hide the principal repayment terms section. The balances are transferred from the future repayments table in the working paper.
 
 
Click on the blue radio button to unlink the repayments table from the working paper. This will allow you to manually enter the repayment terms if desired. The Thereafter row is automatically adjusted as the repayments are entered next to each year.
 
9
Options 1
9. Options 1
  • Sort repayment sections: Sort the 3 repayment sections in the note.
  • Page break above this lease: Toggle on/off the page break above the lease area
  • Opening paragraphs(s): Toggle paragraph on/off at the top of the section.
  • Numerics: Toggle numerics on/off in the section.
  • Linked to working paper: Toggle off/on whether the repayment schedule links to the WP or is manual entry.
 
Please see the following link for more information on the rest of the options.
 
10
Options 2
10. Options 2
  • Sort repayment sections: Sort the 3 repayment sections in the note.
  • Page break above this lease: Toggle on/off the page break above the lease area
  • Opening paragraphs(s): Toggle paragraph on/off at the top of the section.
  • Numerics: Toggle numerics on/off in the section.
  • Comparatives: Toggle off/on the repayment column.
  • Rollforward Amounts: Rollforward amounts from one period table to the subsequent period table.
 
Please see the following link for more information on the rest of the options.
 
11
Print/skip rows
11. Print/skip rows
Check off or uncheck the checkbox to skip or hide the total.
12
Comments (input paragraphs)
12. Comments (input paragraphs)
You can edit existing input paragraphs or insert more paragraphs using the express menu. Refer to Input Paragraphs for more information on inserting paragraphs.
13
Print/skip columns
13. Print/skip columns
Click on the checkbox above each heading to show the applicable column(s). Uncheck the checkboxes to hide the column(s) not applicable.