How do I create a firm master file?
Creating a new Firm Master file involves copying various components from other CaseWare files. Common Firm Master files created are those specifically for Notice to Reader, Review, and Audit Engagements.
If you purchase the Jazzit Programs and Checklists, these can also be incorporated into the masters. If you have the programs and checklists that are in CaseWare format (not Jazzit), these can also be incorporated into new master templates you create. A benefit of having separate NTR, Review, and Audit templates is that staff can easily choose documents that are relevant for the engagement they are completing without the confusion of having to choose which documents apply to specific engagements.
Solution
We suggest using FULMST as a basis for the Firm Master file because it contains all the automatic CaseWare documents such as leadsheets that you will require for your new file.
Create a New CaseWare File from FULMST
Create a new file and base it on the Jazzit Master or Firm template. This will bring in all the documents, mapping and any other components that you need from the Master file into the new client file.
-
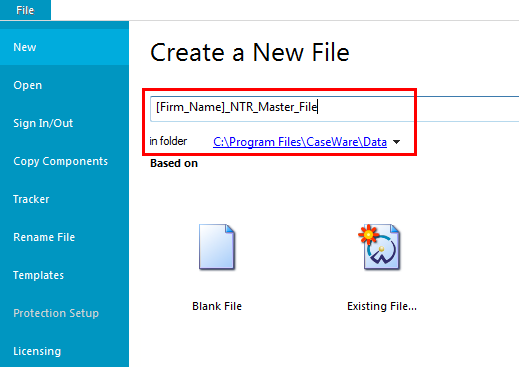
Open an instance of CaseWare and click on the File > New menu item located on the left side of the screen.
-
Enter the client file name in the New file name field.
-
Browse to the location where you want to save the client file or save it to the default CaseWare location as indicated.
-
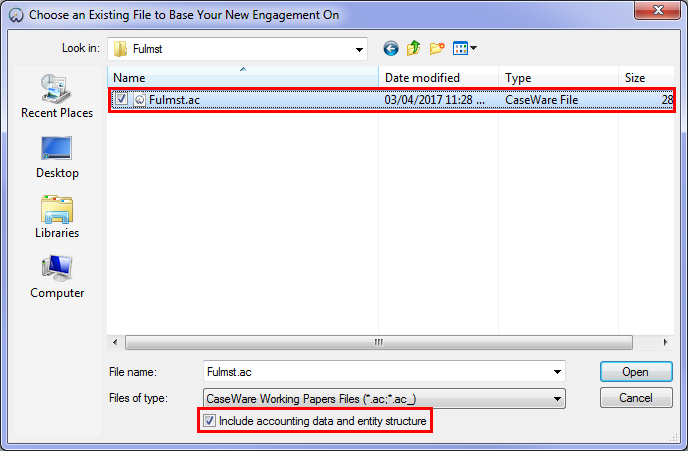
Click on the Existing File icon, select the Create file option and browse to the location of the FULMST.
-
You should ensure that the Include accounting data and entity structure check box at the bottom of the dialog is checked off if you want to bring in a blank trial balance.
-
Click Open, once you have selected the CaseWare (.ac) file.
-
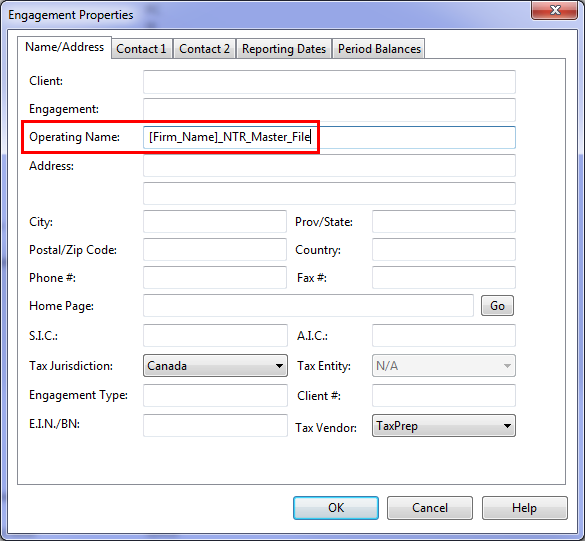
Open the Engagement Properties and change the operating name to reflect the Firm Master name. Click OK to save the changes.
-
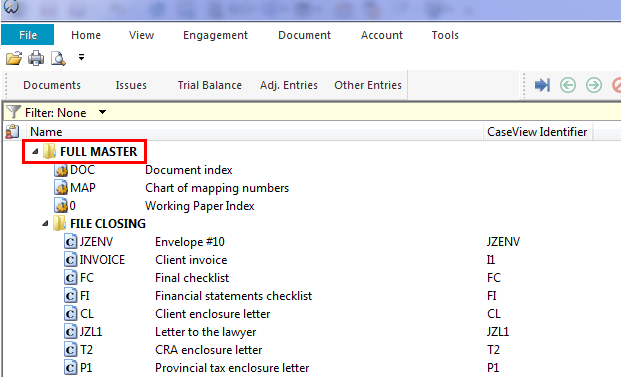
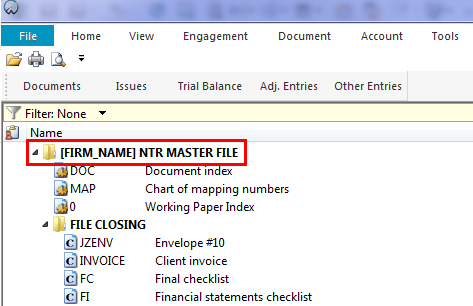
Rename the top level folder from Full Master to your Firm Template name, e.g. [FIRM_NAME] NTR MASTER FILE.
-
Go through the Document Manager and permanently delete the Jazzit templates you do not want to use for the NTR engagement.
-
Open the Jazzit financial statements and set the engagement defaults in the Home Menu.

-
Save and close the Jazzit financial statements.
Adding the Jazzit Programs and Checklists
If you are subscribed to the Jazzit Programs and Checklists then you would also want to copy in the templates required for the specified engagement.
-
Open the newly created Firm Master File, e.g. [Firm_Name]_NTR_Master_File.
-
Go to File > Copy Components and select Copy into this file.
-
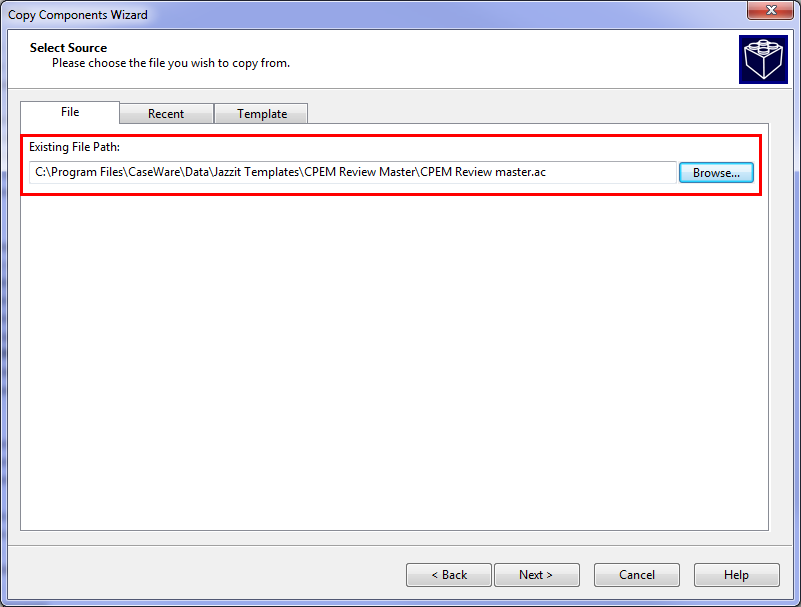
Click on the File tab and browse to where the Jazzit Programs and Checklist Master file (CPEM Audit or NTR/Review or CGA Audit or NTR/Review) that you want to copy from has been saved. Click Next.
-
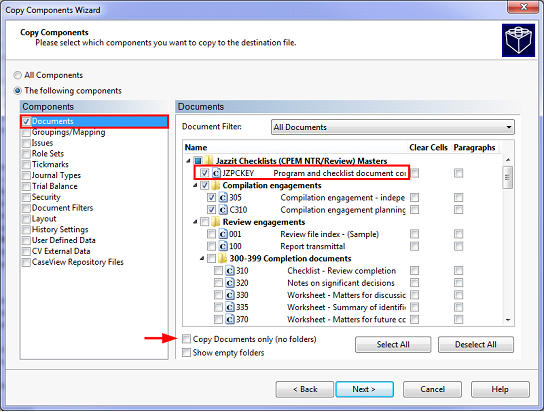
Select The following components and check off the Documents checkbox.
-
Choose which Programs and Checklists you want to bring into the Firm Master File. The JZPCKEY(A) should be copied into every CaseWare file where the Jazzit Programs and Checklists will be used. This document is used to set up staff names and to connect the Programs and Checklists to the Jazzit Programs and Checklists KLIB (Resource Centre) .
 If this is the first time you are copying in the Jazzit Programs and Checklists Templates, we recommended unchecking the Copy Documents only (no folders) checkbox to bring in the same folder structure as the Jazzit Master File.
 -
Click Next to complete the Copy Components Wizard. Click Finish to complete the Copy Components process.
-
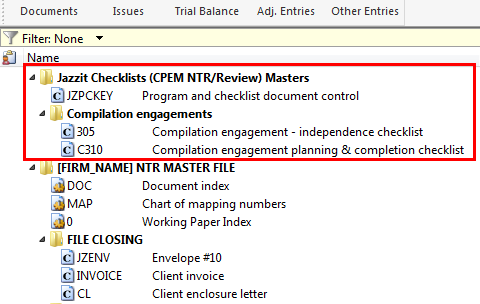
The Jazzit Checklist and Programs are added to the top of the Document Manager.
|
|
What if I don’t use the Jazzit Programs and Checklists?
If you are using third-party provided CaseView Programs and Checklist you can still copy in the third-party Programs and Checklists into the Jazzit Firm Master File using Copy Components. In some instances you may need to copy the Jazzit Templates into the file where the third-party Programs and Checklists have been created in.
|