HELP GUIDE
×
Menu
Quick Guides
Working Paper Options
 
Working Paper Options
1
Format
1. Format
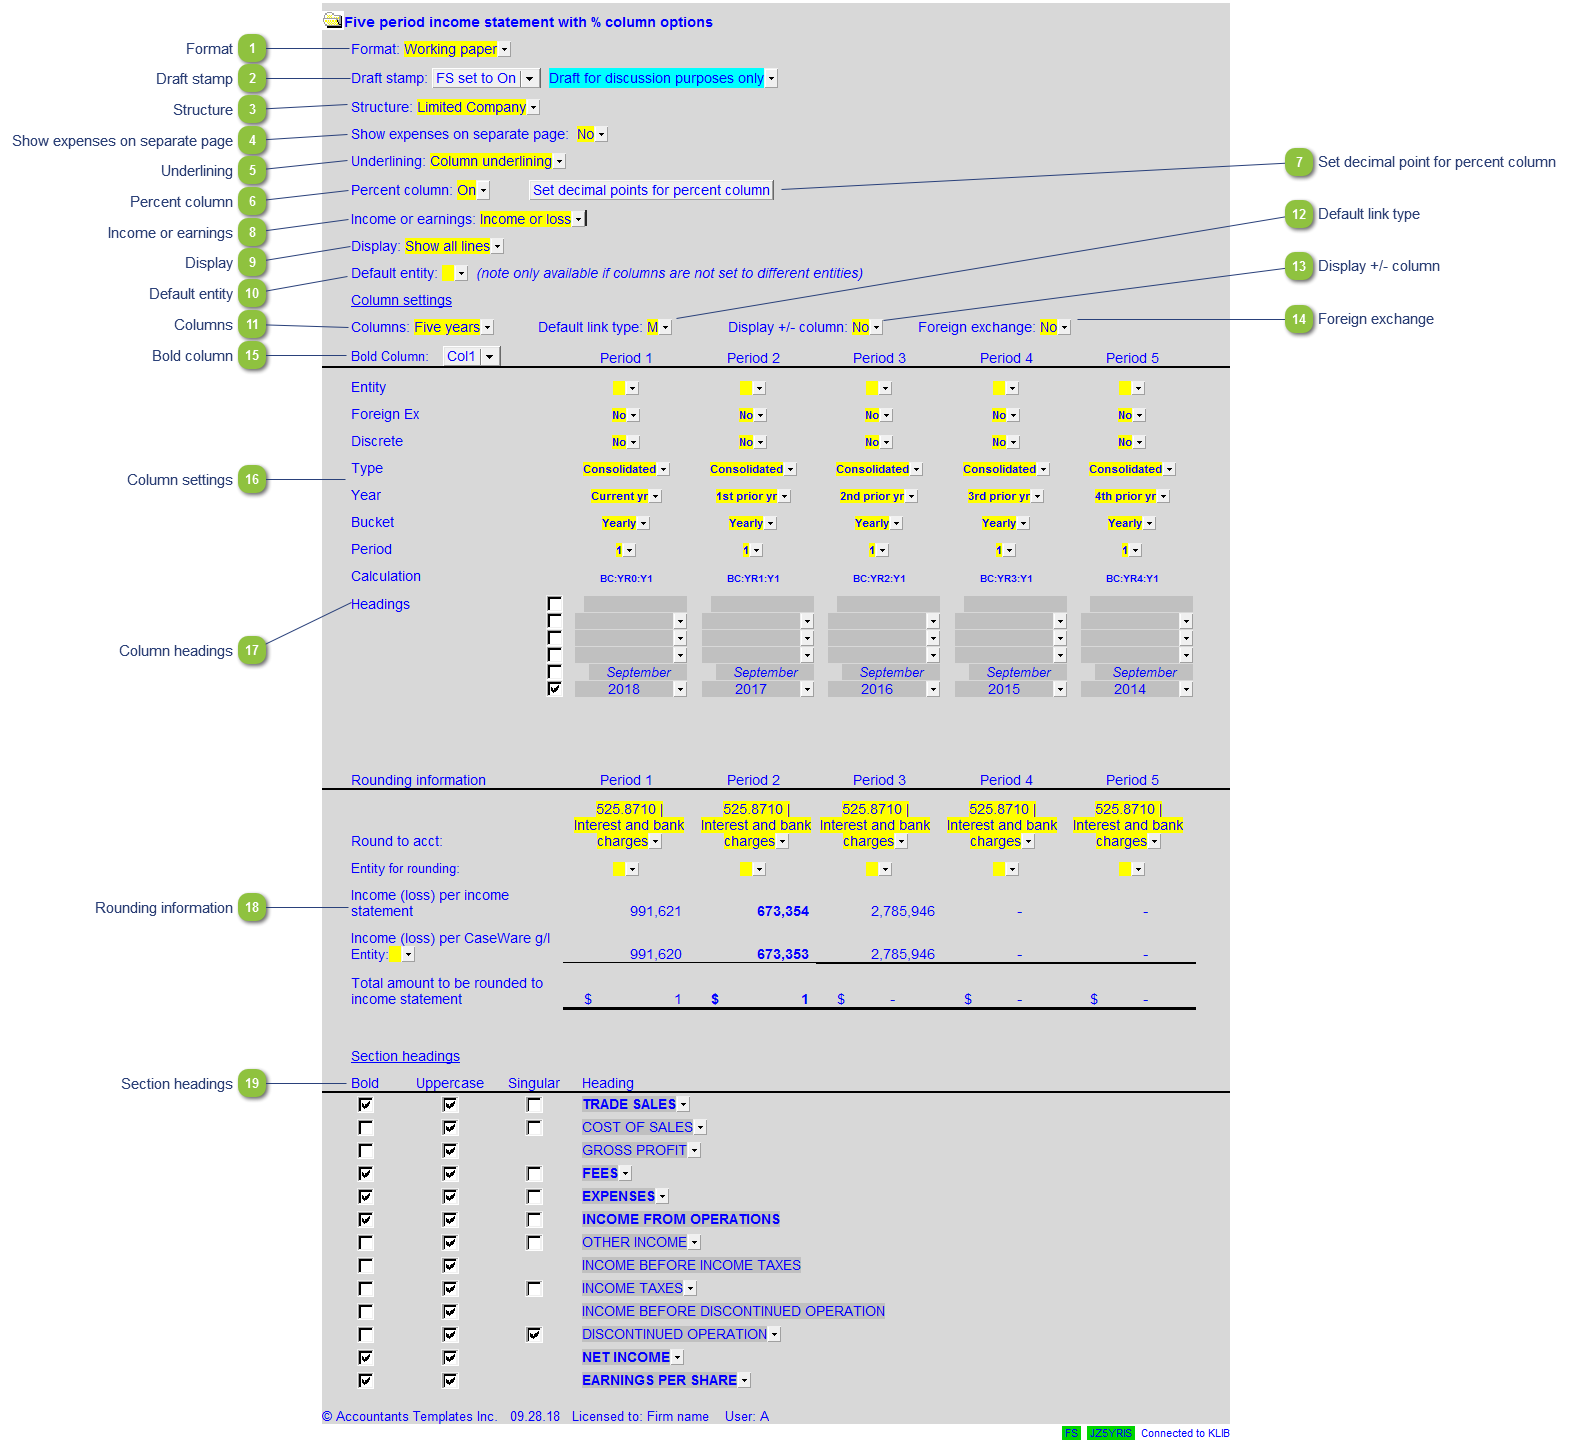
The format option has 2 presets that allow the working paper to be presented to clients (Client version) or internal use (Working paper):
  • Setting the format to Client version will set the: Link number, Annotations, and reference columns to Display only, preventing them from printing. It will also prevent the sign off boxes found at the top or bottom from printing.
  • Setting the format to Working Paper will set the: Link number, Annotations, and reference columns to Display and Print. The sign off boxes will print on the top and bottom of the working paper.
2
Draft stamp
2. Draft stamp
The default option for the Draft stamp is set in the Diagnostics Report. If the default is not set to either globally on or off, you can set it manually for this working paper together with the draft wording.
3
Structure
3. Structure
Set the entity structure for the working paper. This is defaulted to the selection in the Financial Statements.
4
Show expenses on separate page
4. Show expenses on separate page
Choose to show the expenses on a separate page.
5
Underlining
5. Underlining
Select between column or margin to margin underlining.
6
Percent column
6. Percent column
Turn the percentage columns on or off.
7
Set decimal point for percent column
7. Set decimal point for percent column
Set the number of decimal points for the percentage columns,
8
Income or earnings
8. Income or earnings
Set the description for the income or earnings lines in the working paper.
9
Display
9. Display
Choose to show either all lines, or only printing lines for easier review of the working paper.
10
Default entity
10. Default entity
Select the default entity to be used in the working paper.
11
Columns
11. Columns
Select the number of columns to be used in the working paper.
12
Default link type
12. Default link type
Select the default grouping you want to use for the schedule linkage. The schedule is defaulted to use the Map No link.
13
Display +/- column
13. Display +/- column
Set to display the signage column to the right of each line.
14
Foreign exchange
14. Foreign exchange
Select to apply foreign exchange to the working paper.
15
Bold column
15. Bold column
Select which column in the working paper to bold.
16
Column settings
16. Column settings
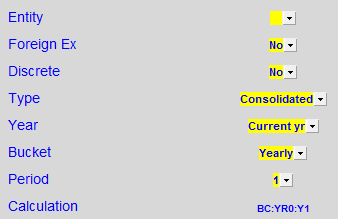
  • Entity - Assign the entities to the relevant columns. Entities should be added using the consolidations dialog in Caseware.
  • Foreign Ex - The foreign exchange can also be applied to each individual column(s).
  • Discrete - Select the discrete period (Yes = Period movements, No = cumulative balances up to period selected (year-to-date)).
  • Type - Select the balance type (budget, consolidated, report, adjusted, unadjusted, forecast) that you want to use. This can be used when setting up Group/Company statements.
  • Year - Select the financial year (current, prior 1 through 4) for each column.
  • Bucket - Select the bucket (active, random, yearly, semi-annually, quarterly, monthly, etc.) for each column.
  • Period - Select the relevant period within the year selected that you want to view. This is dependent on the Bucket selected.
17
Column headings
17. Column headings
Select which column headings are to print the wording.
18
Rounding information
18. Rounding information
From the dropdown, select which account is to be rounded to for each individual column.
19
Section headings
19. Section headings
Select between bold, uppercase, and singular (or combination of the three) for each section heading in the wording paper.