To properly display this page you need a browser with JavaScript support.
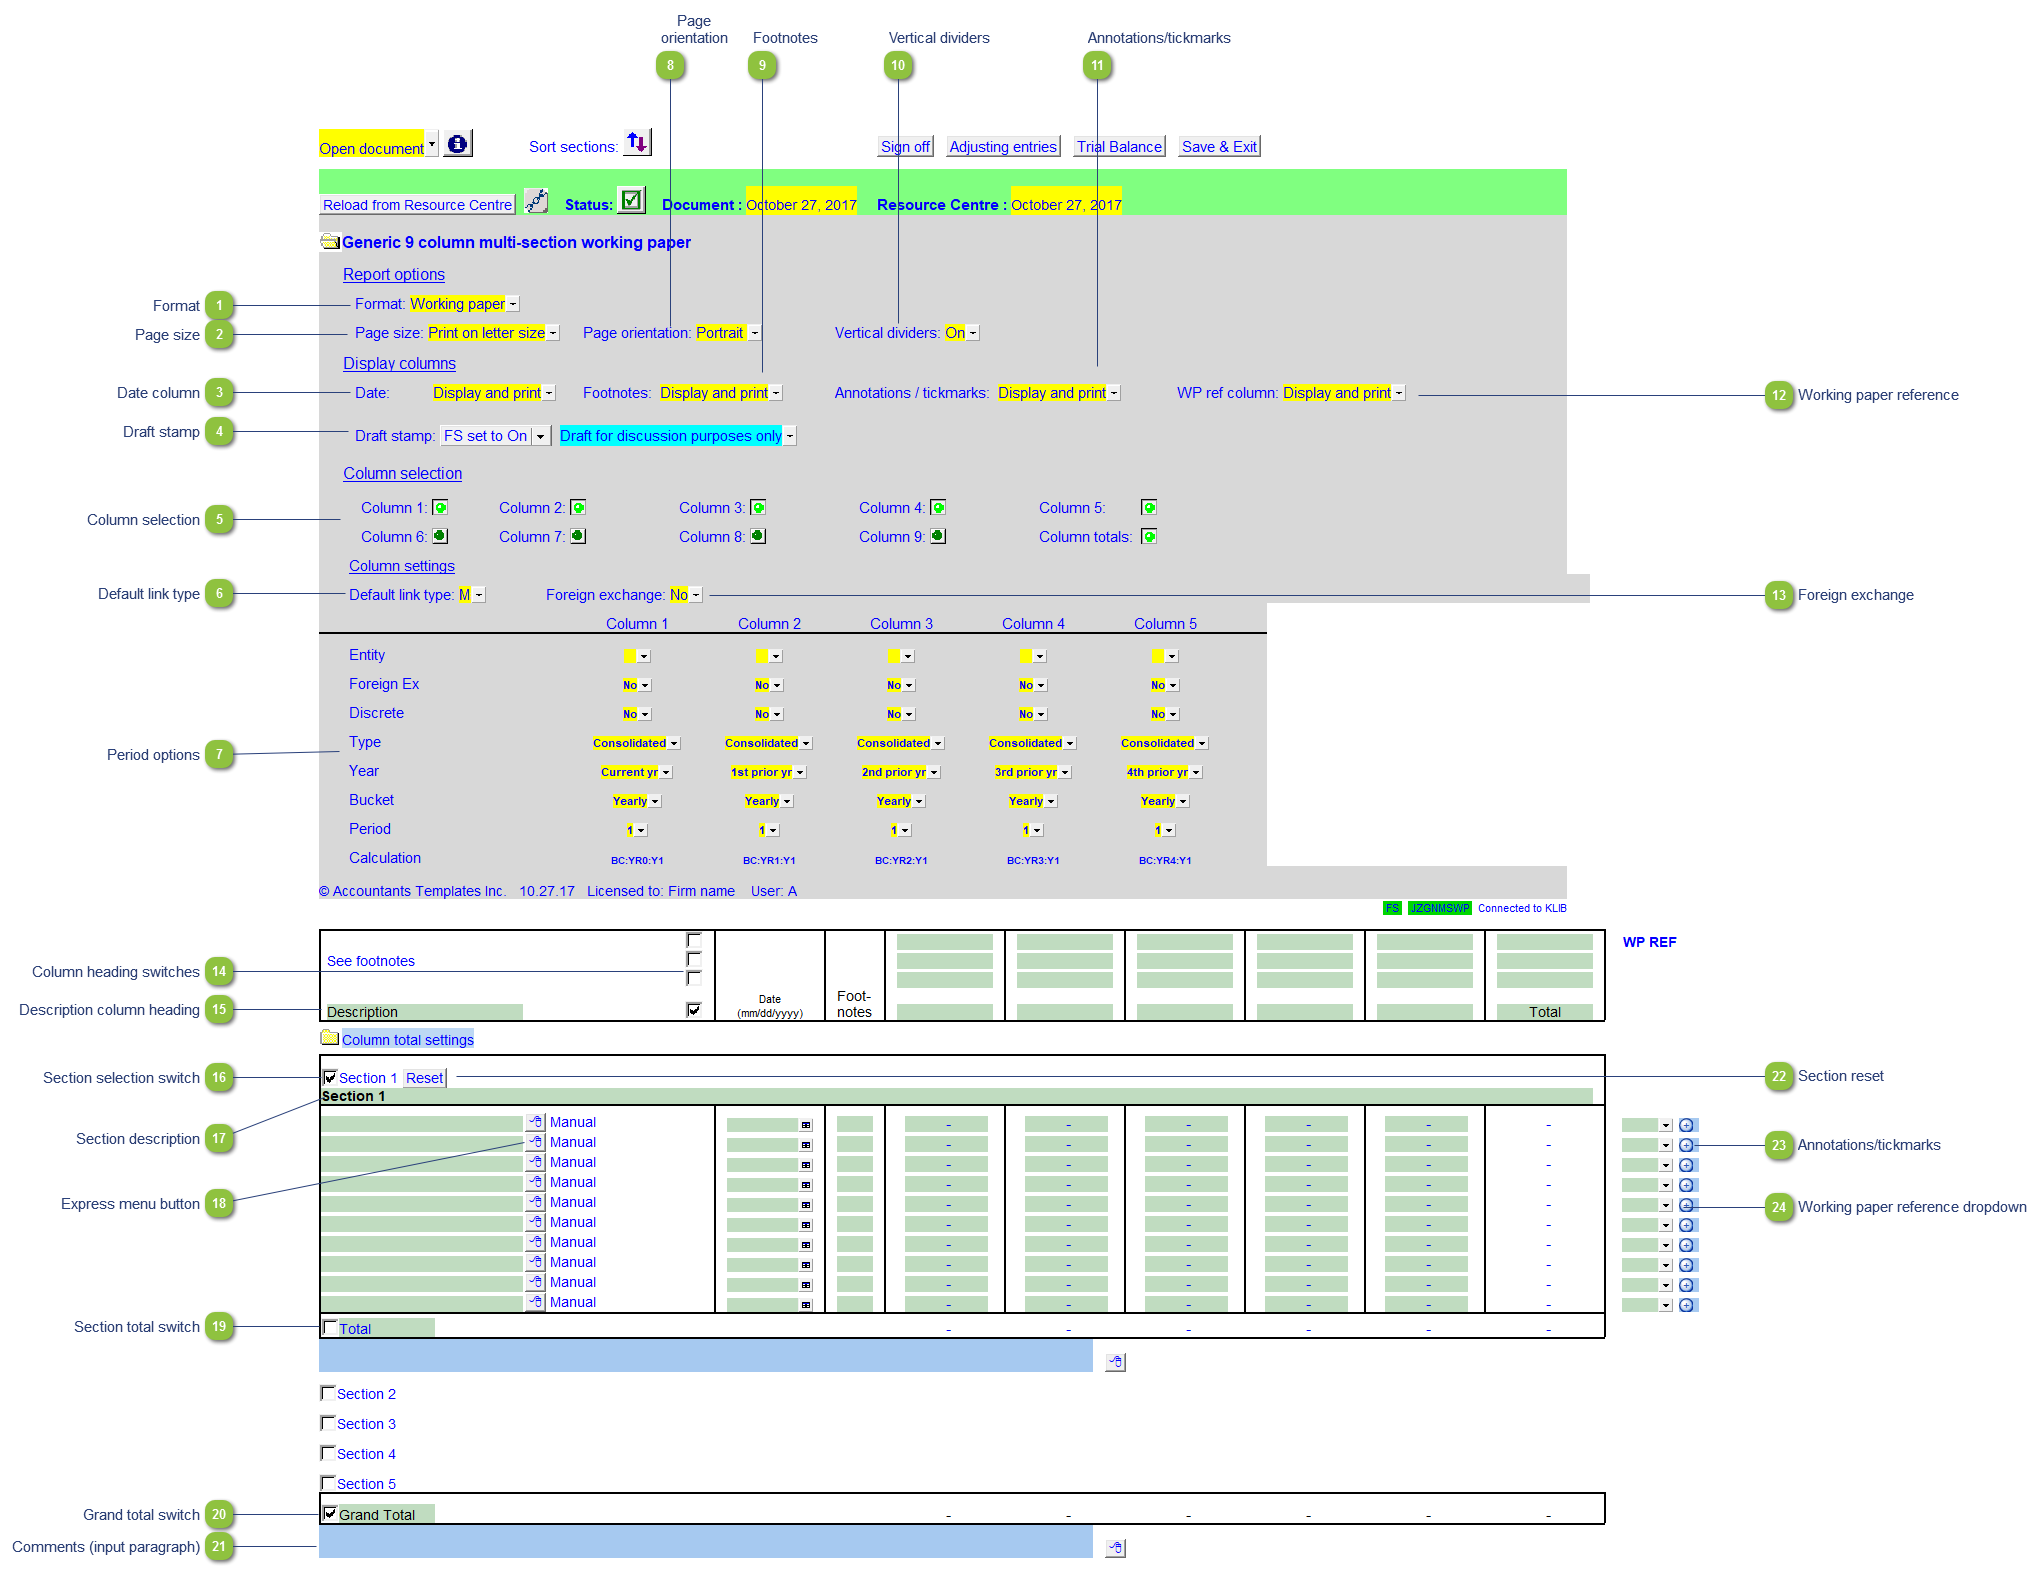
Generic 9 column multi-section (JZGNMSWP)
Format
The format option has 2 presets that allow the working paper to be presented to clients (Client version) or internal use (Working paper):
Setting the format to
Client version will set the: Link number, Annotations, and reference columns to Display only, preventing them from printing. It will also prevent the sign off boxes found at the top or bottom from printing.
Setting the format to Working Paper will set the: Link number, Annotations, and reference columns to Display and Print. The sign off boxes will print on the top and bottom of the working paper.
Page size
Select to print the working paper on either letter legal
Date column
Use the popup menu to select to Display and Print Hide Display Dates
Display and Print : Shows the
Dates when printing the working paper.
Display: Displays the
Dates in CaseView but does not print.
Hide : Hides the column and does not print.
Draft stamp
The default option for the
Draft stamp is set in the
Diagnostics Report. If the default is not set to either globally on or off, you can set it manually for this working paper together with the draft wording.
Column selection
Choose which columns to display or hide
Default link type
Set the default link type for linked lines in the working paper. Link types can be changed on individual rows if required
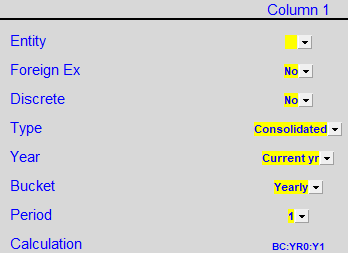
Period options
Page orientation
Select to print the working paper in either portrait landscape
Footnotes
Use the popup menu to select to Display and Print Hide Display Footnotes
Display and Print : Shows the
Footnotes when printing the working paper.
Display: Displays the
Footnotes in CaseView but does not print.
Hide : Hides the column and does not print.
Vertical dividers
Use the popup menu to toggle the divider lines on the statements on/off..
Annotations/tickmarks
Use the popup menu to select to Display and Print Hide Display Annotations/tickmarks
Display and Print : Shows the
Annotations/tickmarks when printing the working paper.
Display: Displays the
Annotations/tickmarks in CaseView but does not print.
Hide : Hides the column and does not print.
Working paper reference
Use the popup menu to select to Display and Print Hide Display Working paper references
Display and Print : Shows the
Working paper references when printing the working paper.
Display: Displays the
Working paper references in CaseView but does not print.
Hide : Hides the column and does not print.
Foreign exchange
Select to use foreign exchange in the working paper.
Column heading switches
Select which column headings should print.
Description column heading
Set the description for the description column heading.
Section selection switch
Using the tickbox, select which section/s you would like to use in the working paper.
Section description
Set the name for the section.
Express menu button
Right-click on the
express menu to insert more linked or manual lines, insert subtotals, sort and delete current lines where the options are available.
Section total switch
Using the tickbox, select to print or skip the section total.
Grand total switch
Using the tickbox, select to print or skip the working paper grand total
Comments (input paragraph)
You can edit existing input paragraphs or insert more paragraphs using the
express menu . Refer to
Input Paragraphs for more information on inserting paragraphs.
Section reset
Click to reset the specific section from the Resource Centre without having to reload the entire working paper.
Annotations/tickmarks
Double-click to enter a annotation or tickmark for the specific row.
Working paper reference dropdown
Select a working paper reference for the specific row.