* the above screenshot was taken with the display option set to show Printing lines for illustration purposes. We recommend the default display option is set to Show all lines when drafting the financial statements.
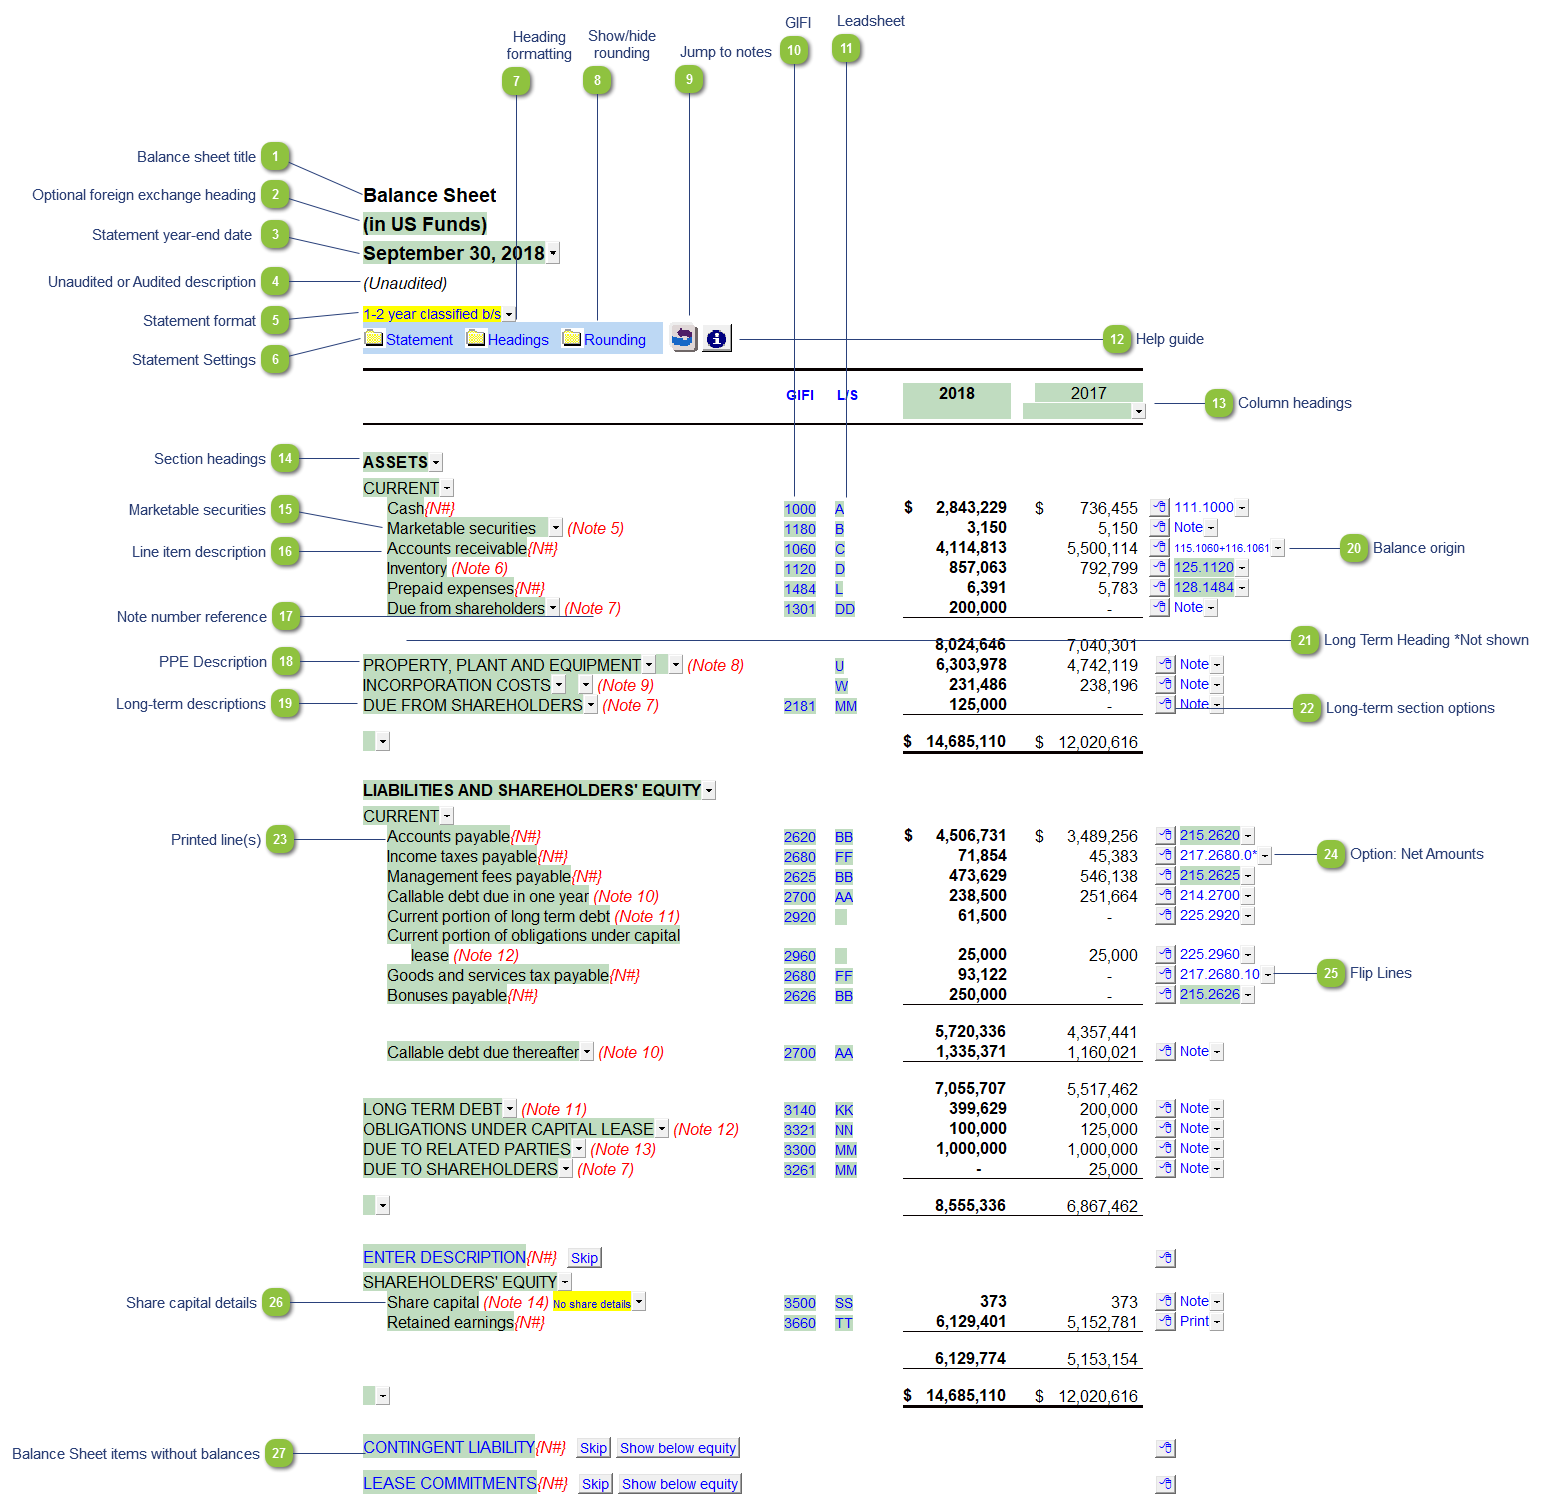
Balance sheet title
Use the popup menu to choose an alternative name for the Balance Sheet. The selection you make will be updated in the Engagement Report and wherever the Balance Sheet title appears. The title will change depending on the structure selected under the Client profile section of the Home Menu, i.e. Not for Profit = Statement of Financial Position. You can also override the default description manually if your choice of description is not available.
When you choose a prefix for the statements (i.e. consolidated, proforma, etc.) in the Page options section of the Home Menu, this prefix will automatically appear before the Balance Sheet name.
The foreign exchange heading pulls from the selections made in the Columns section of the Home Menu. Double-click on the cell to jump to the Home Menu.
The statement year-end date is automatically calculated based on the reporting dates set in the Engagement Properties dialog. Use the popup menu to display an alternative date format.
The newest Review and Compilation standards no longer require '(unaudited)' to show up in the heading. This can be added back in via the Report alert field in the Engagement Report Options
The statement settings provide additional options for the Balance Sheet.
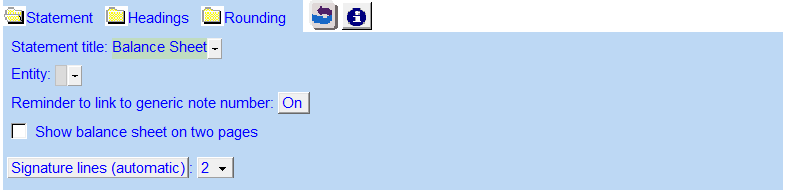
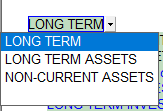
Statement title: Use the popup menu to choose an alternative statement name or manually enter the name in the input field. The statement name changes depending on the type of structure selected in the Client Profile section of the Home Menu.
Entity:Use the popup menu to select an entity to report on. Entities need to be added in Consolidate dialog in Caseware. The statements are defaulted to the top-level entity. Please see Setting up entities in Caseware for more information on setting up entities.
Reminder to link to generic note number: Select to switch the reminder on or off. This will give you a warning message when connecting a generic note to remind you to link the note number reference to the statement if applicable.
Show balance sheet on two pages: Split the balance sheet on 2 pages with the asset section on the first page and the liabilities/equity on the 2nd page. This is useful for presentation purposes when only a small portion of the balance sheet is on the 2nd page. This option can also be found in the Home menu in the Page options category.
Signature lines: Set the dropdown to manual for more fine grained control over signatures in the balance sheet. Control spacing around signature lines, # of signature lines and whether dual signatures are stacked or side by side. See Signature Lines section of the Home menu for more information.
The GIFI code for each line item is shown. Double-click on the GIFI code to see which accounts are linked to that code. You can set the GIFI column to Display and print, Hide or Display in the Display section of the Home Menu.
The leadsheet group for each line item is shown. Double-click on the leadsheet number to see which accounts are linked to that leadsheet. You can set the Leadsheet column to Display and print, Hide or Display in the Display section of the Home Menu.
The column headings appear at the top of the Balance Sheet. The content of the first two rows are generated from the Engagement Properties settings in Caseware and the Short year section of the Home Menu. The cells can also be manually overridden if necessary.
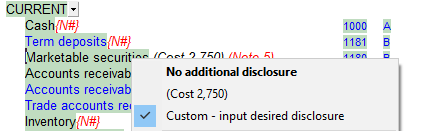
Right-click on the marketable securities description for the option to disclose the cost figure as entered in the corresponding note or manually entered.
The line item description is populated from the map number description. Refer to Change a line description for information on the best way to change the description if needed.
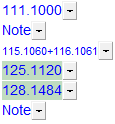
The note number reference indicates which note is attached to the line item. Click on the note number to jump to the referenced note. A {N#} reference either indicates that the referenced note is turned off or that there is no note assigned. Refer to Changing or adding note number references in the statements to learn more about changing or adding note references.
If you would like to know where a balance is coming from, review the link information on the right side of each line. Refer to Balance origin for more information.
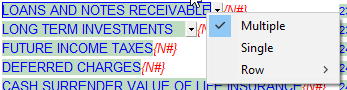
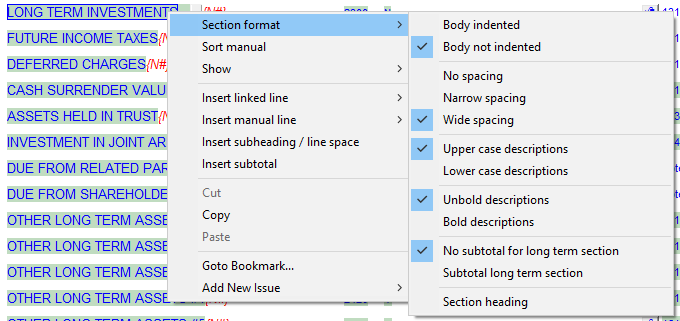
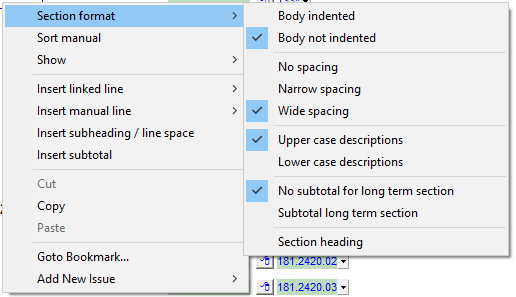
The long-term sections (assets and liabilities) of the Balance Sheet have additional options in the Section format submenu that can be accessed via theexpress menu():
Spacing: Set the spacing preference for the long-term section. This option can be used when trying to fit the Balance Sheet one page.
Descriptions case: Choose to show the long-term descriptions in upper or lower case.
Long-term section subtotal: Show a separate subtotal for the long-term section.
Section heading: You can choose to print the section heading. The heading is skipped by default.
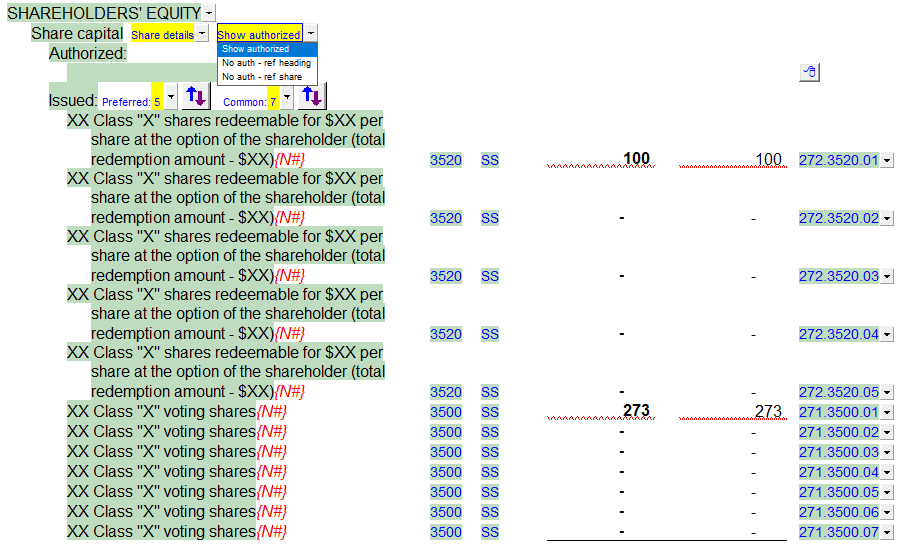
You can choose to show details of share capital. When you choose to show share details from the drop-down menu, you then can show authorized, not show authorized but show a heading for the common and preferred shares. For both common and preferred shares you can choose to show the authorized and issued details for up to 10 classes for preferred shares and 10 for common shares.
Contingent liabilities, lease commitments, or other items that do not have a balance but are required to be shown on the Balance Sheet either above equity or at the bottom of the Balance Sheet can be presented and can include a note reference if required. Use the blue drop-down cell to select where you want to show the line items on the Balance Sheet.