* the above screenshot was taken with the Threshold amount set to 1for illustration purposes.
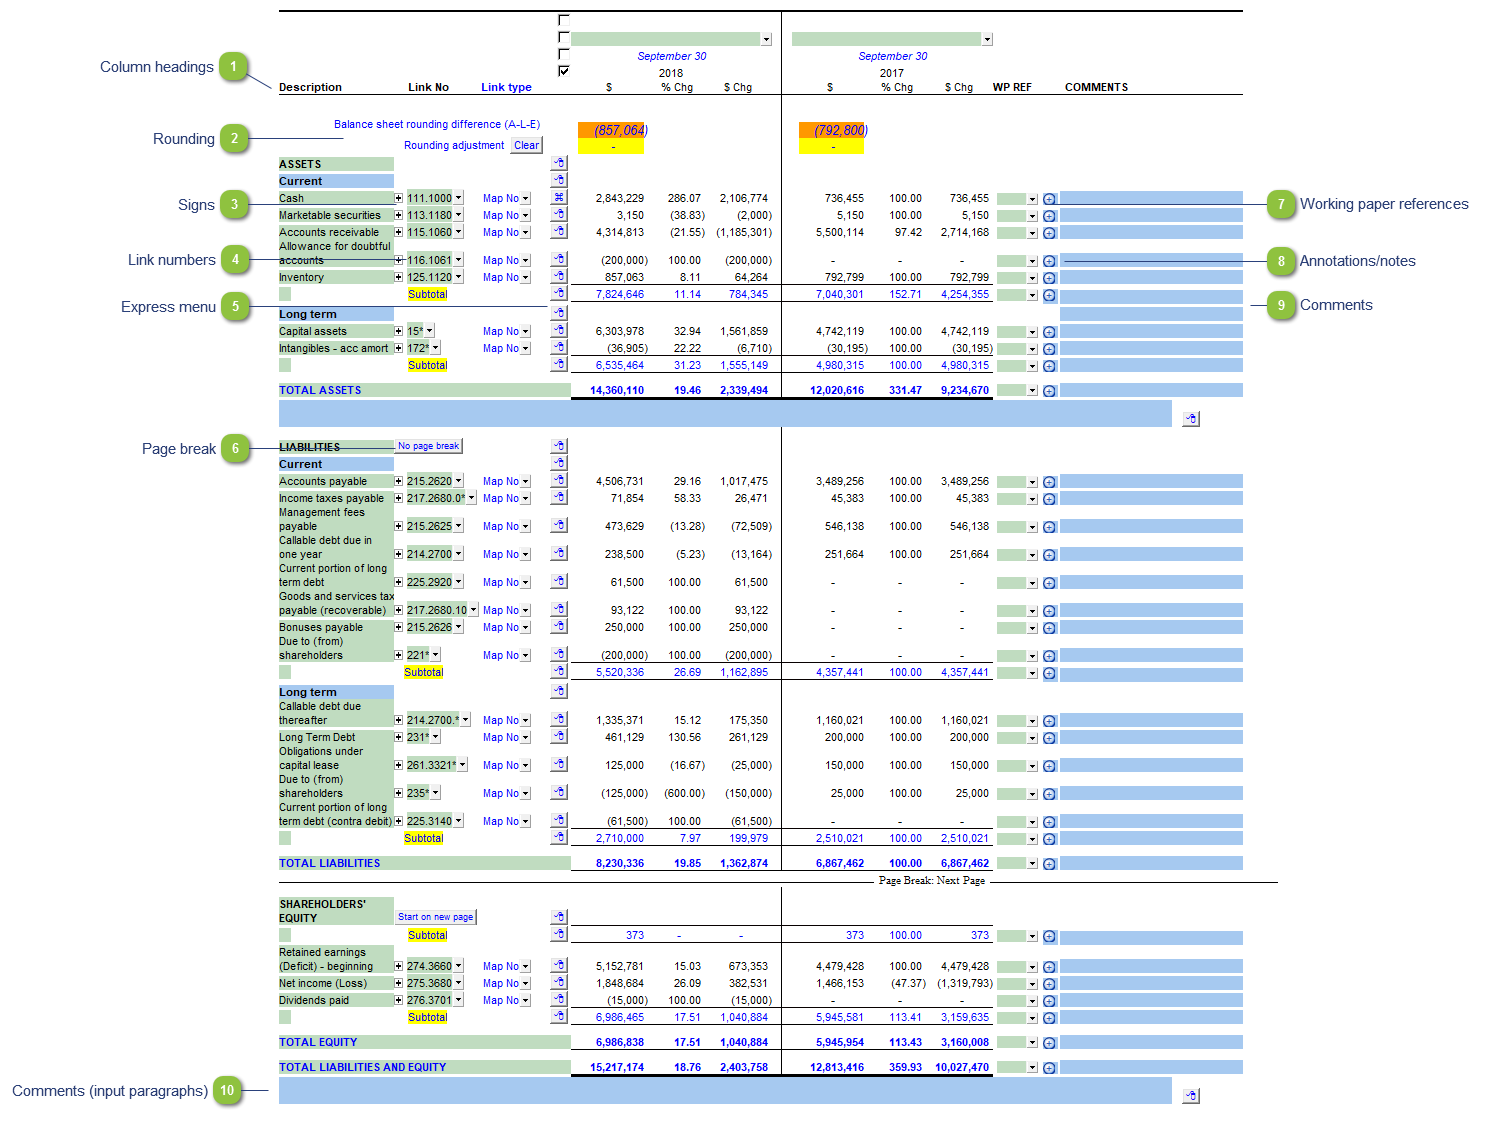
Column headings
Use the checkboxes to the left of each heading line to skip or print the headings. Select the heading option you'd like to print using the popup menus. The following headings are available:
Row 1: Entity name - This is populated from the Engagement > Consolidate dialog in Caseware.
Row 2: Balance type - Consolidated, Report, Unadjusted, Adjusted, Budget and Forecast. This can be used in conjunction with the balance type setting selected in the column settings.
Row 3: Selected period - Year-to-date, Months, Quarters, Periods, etc.
Row 4: Shows the year-end. You can also choose to show the balance type here.
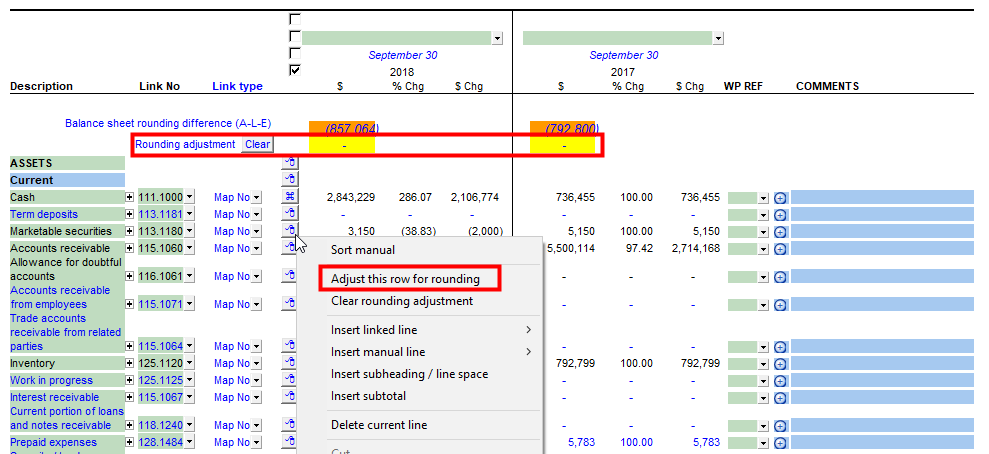
The Balance Sheet section of the working paper has support for rounding. The rounding difference is automatically calculated and shows at the top of the Balance Sheet in orange cells.
To designate a rounding line, right-click on theexpress menuof the line item to be used for rounding and select Adjust this row for rounding. Theexpress menuwill change to to indicate the designated rounding line. The orange cells should disappear when the statement is rounded properly.
The link number indicates which linked number (i.e. map number) the row is linked to. Use the popup menu to select a link number. This can be a map, account or group number depending on the linkage options selected in the template options.
Use the popup menu to select a working paper from the Document Manager to reference to. Double-click on the reference to open the reference working paper. You can change the display settings in thetemplate options section of the working papers.
Double-click on the annotations icon to add an annotation or note to the line item. You can change the display settings in thetemplate options section of the working papers.
You can edit existing input paragraphs or insert more paragraphs using theexpress menu. Refer to Input Paragraphs for more information on inserting paragraphs.